Introduction
The filters and props demo has some great virtual props. They look fabulous, and are deceptively simple to make and use.

Sample props included with Breeze Booth (iPad+ iPhone) 1.0.4
Breeze Booth subscribers are welcome to use these props at their own events. You can also add your own props, which need to be png images.
How to add props to your designs
- Start in the Event Editor with a new or existing Breeze Booth event
- Place a png image of each prop you want to use in your Breeze Booth screens folder.
- Use the virtual prop editor to position and size the prop correctly.
- Save your work and ensure the manifest is updated.
- Transfer your new design to your iPads
- Switch on High Quality Face Detect (best for newer iPads/iPhones)
- Check that you are happy with the effect, and tweak it if you need to.
Start from an event
The first example adds one prop to a design built using the event creator. There is no need to start from scratch, you can add props to an existing event in the same way.
Start the Breeze Booth Event Editor and create your first event. You can find instructions here.
Hint: if you save your work directly to Dropbox, it’s very easy to run the result on your iPad, and tweak the design if you need to. To learn how to use Dropbox to transfer your work to the iPad, see this tutorial.
Put the prop(s) into your screens folder
The screen folder is shown in the General page of the Event Editor. You can open this folder using the Open button.
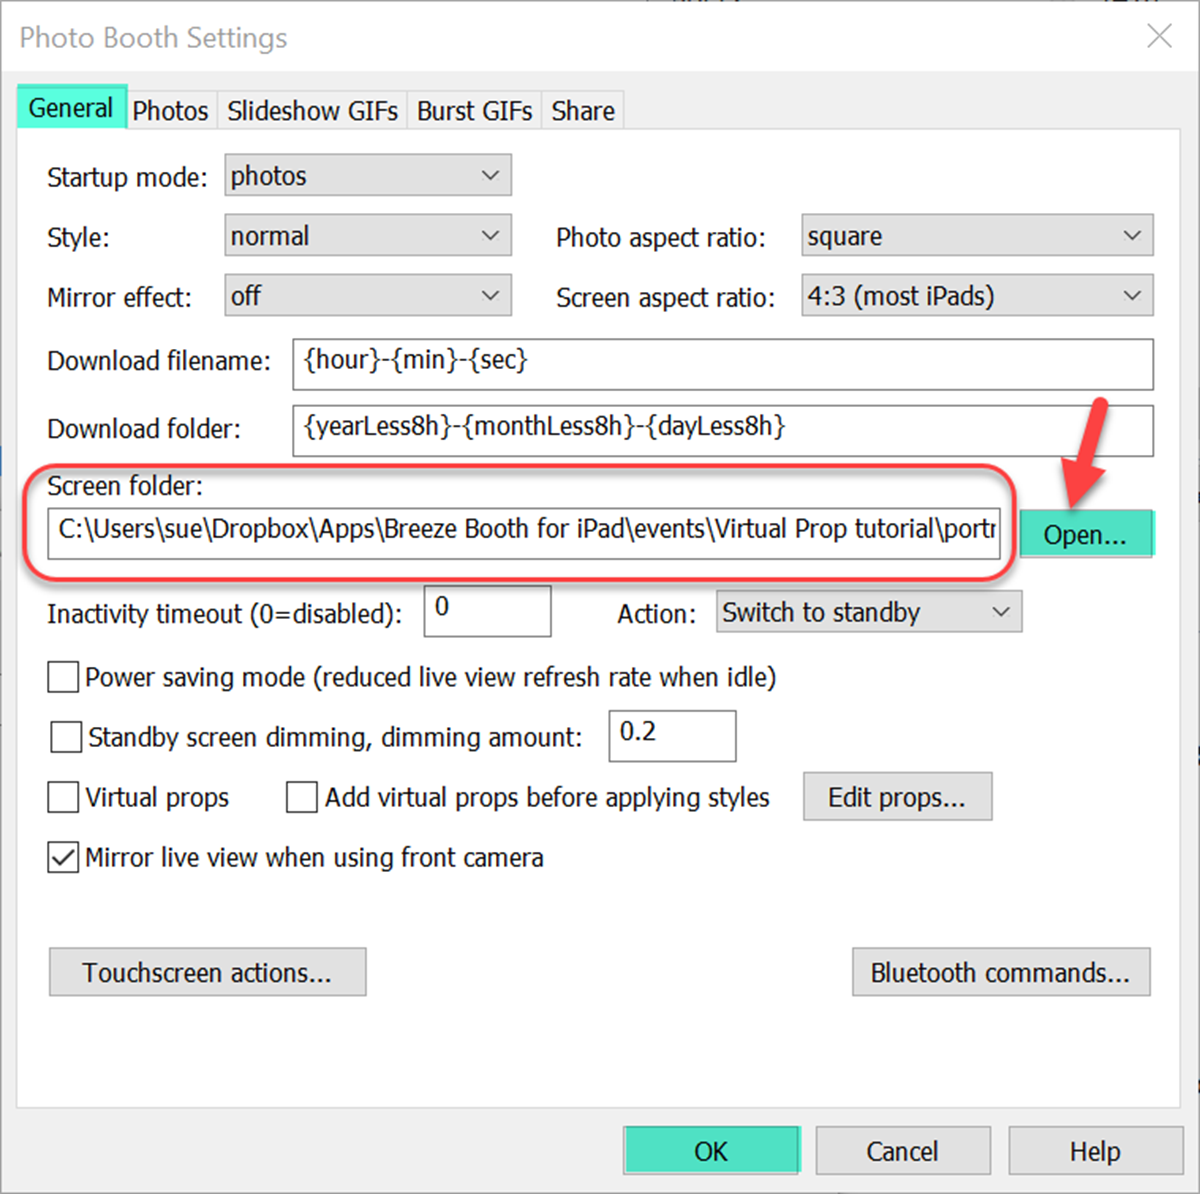
Screen folder shown in Event Editor General tab (Breeze Booth for iPad)
Copy your prop into this folder, and call it prop1Normal_{w48%h66%}.png
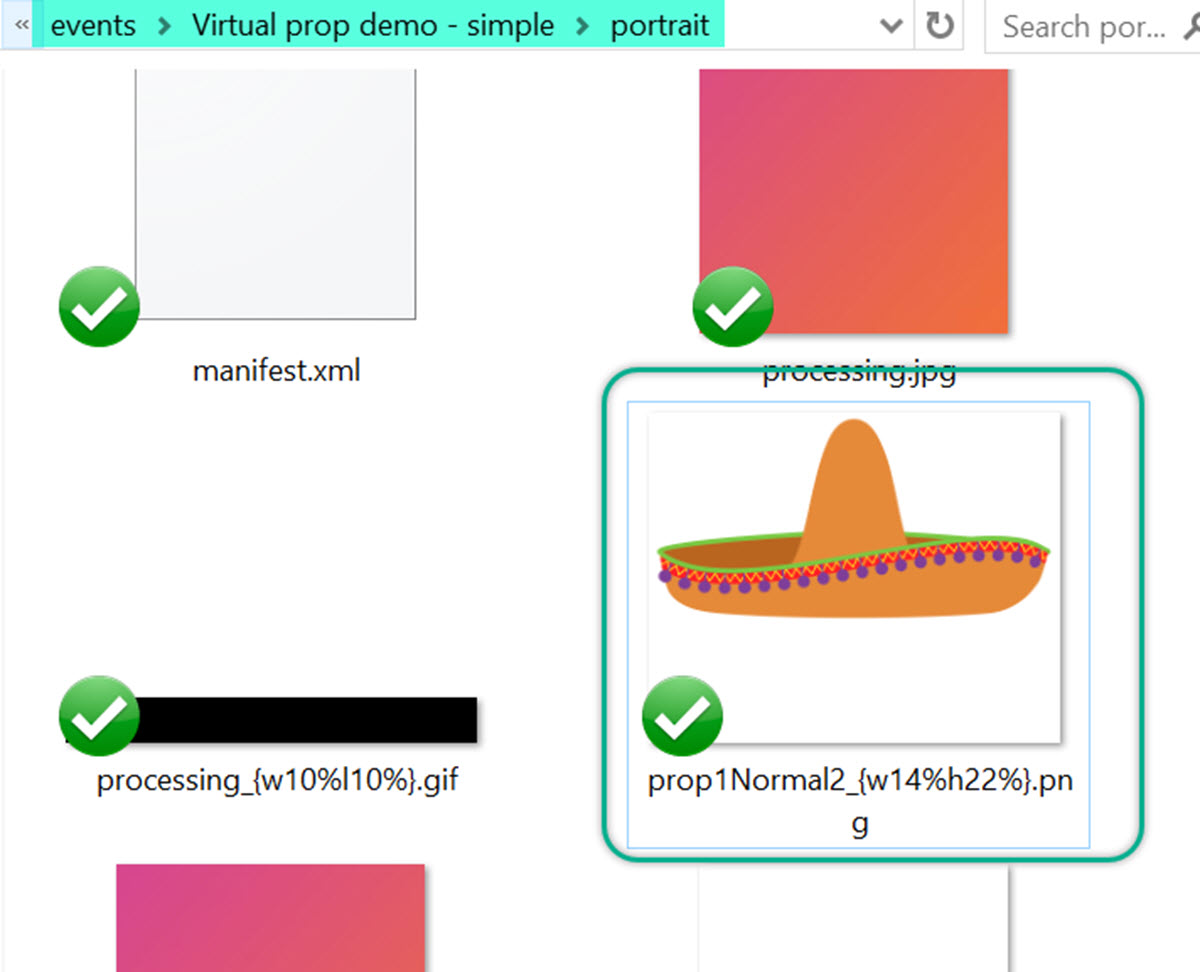
Sombrero prop in screens folder ( Breeze Booth Event Editor 1.3.1)
It doesn’t matter if the png image you start from is not the correct size. (Here I started with png images around 1000-1500 pixels wide, but you may choose something different. ) We will adjust the size in the Virtual Prop Editor:
Position and size the prop using the virtual prop editor
Check the virtual props box to tell the editor to use the props in this design:
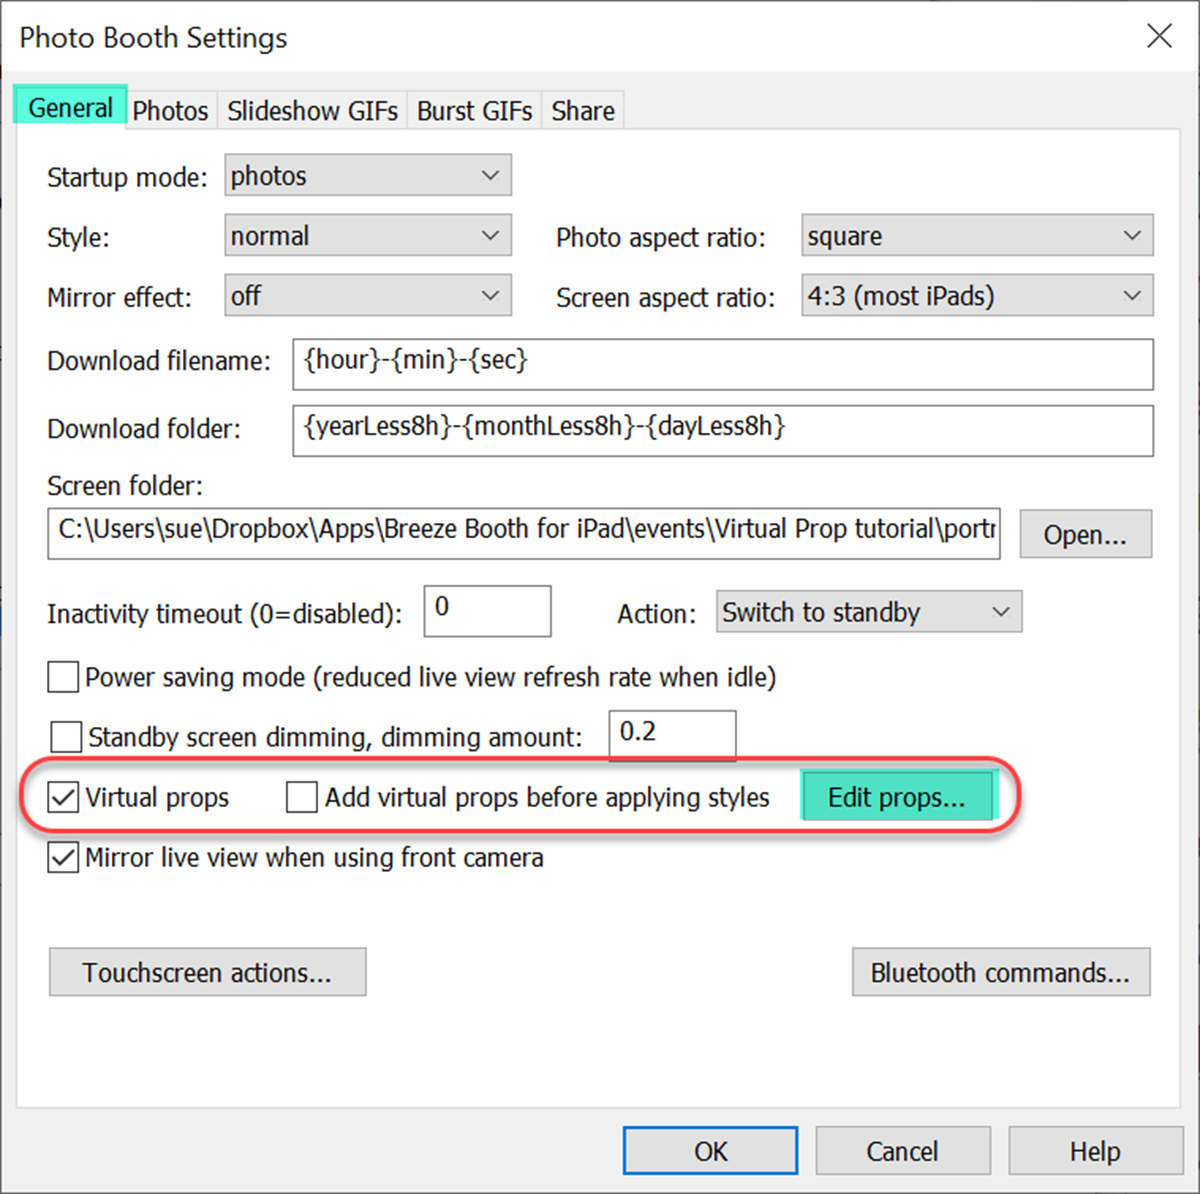
To apply virtual prop(s) to a design, check Virtual props. Select Edit props… to size and place the prop correctly.
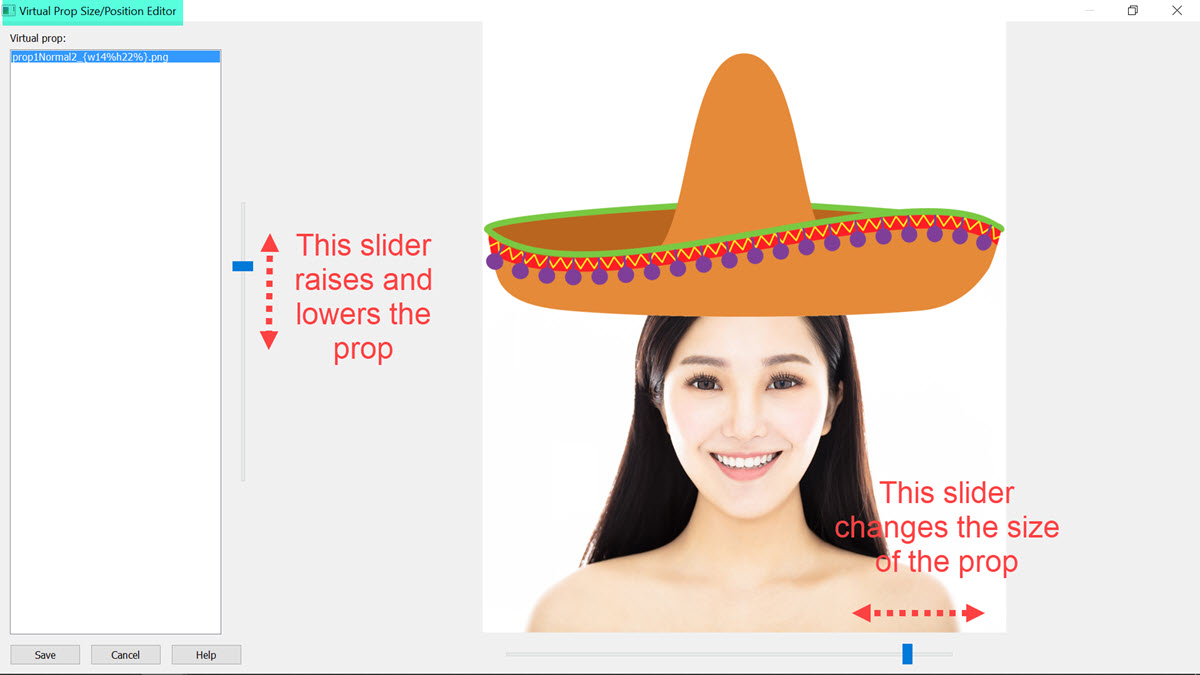
Using the virtual prop editor in Breeze Booth Event Editor 1.3.1
Save your changes when you leave.
Note: You may notice that each time you adjust the height or size of a prop and save it, the prop filename will change. Let the Event Editor control these changes – they provide the App with information it needs to run correctly.
You will be prompted to update the manifest file – select Yes.
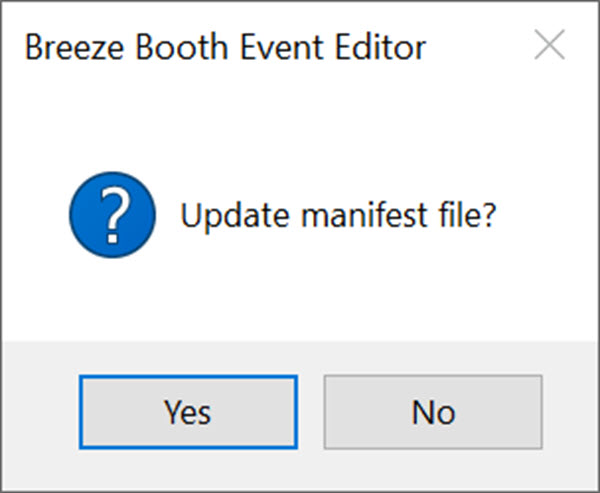
Always select Yes to update the manifest so that your your updates are applied when the design is transferred to/updated on the iPads
Transfer your design to the iPad
Dropbox users can find instructions here
Those of you updating events via your own website can find instructions here
Switch on High Quality Face Detect (recent and Pro devices)
This option increases the stability of virtual props on iPads and iPhones with more powerful processors.
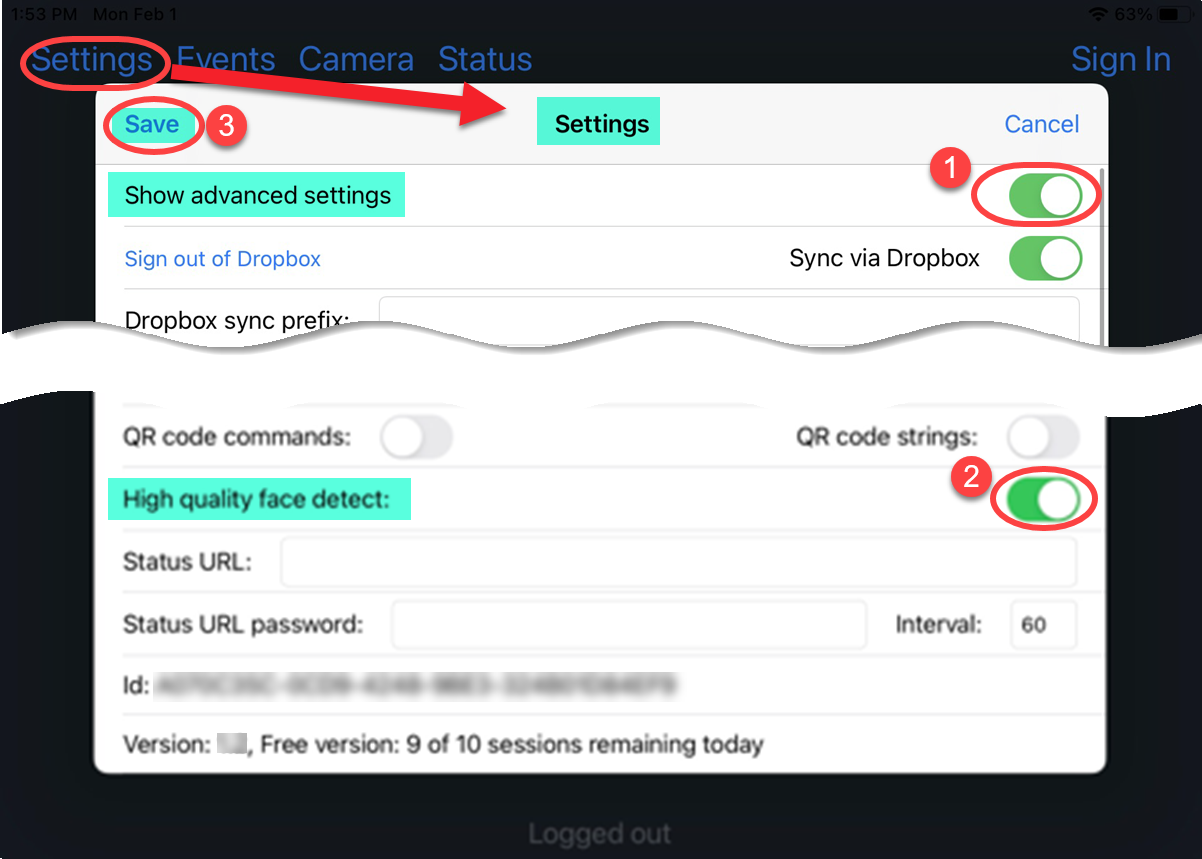
High Quality Face Detection is toggled on and off on the Breeze Booth Settings Screen. Show Advanced Settings (1) to reveal the High Quality Face Detect button (2). Save your changes to the Settings (3) before leaving the screen (Breeze Booth 1.2)
Run the event and check everything works well
The prop is displayed in the live view, and included in photos and GIFs.

Ola!
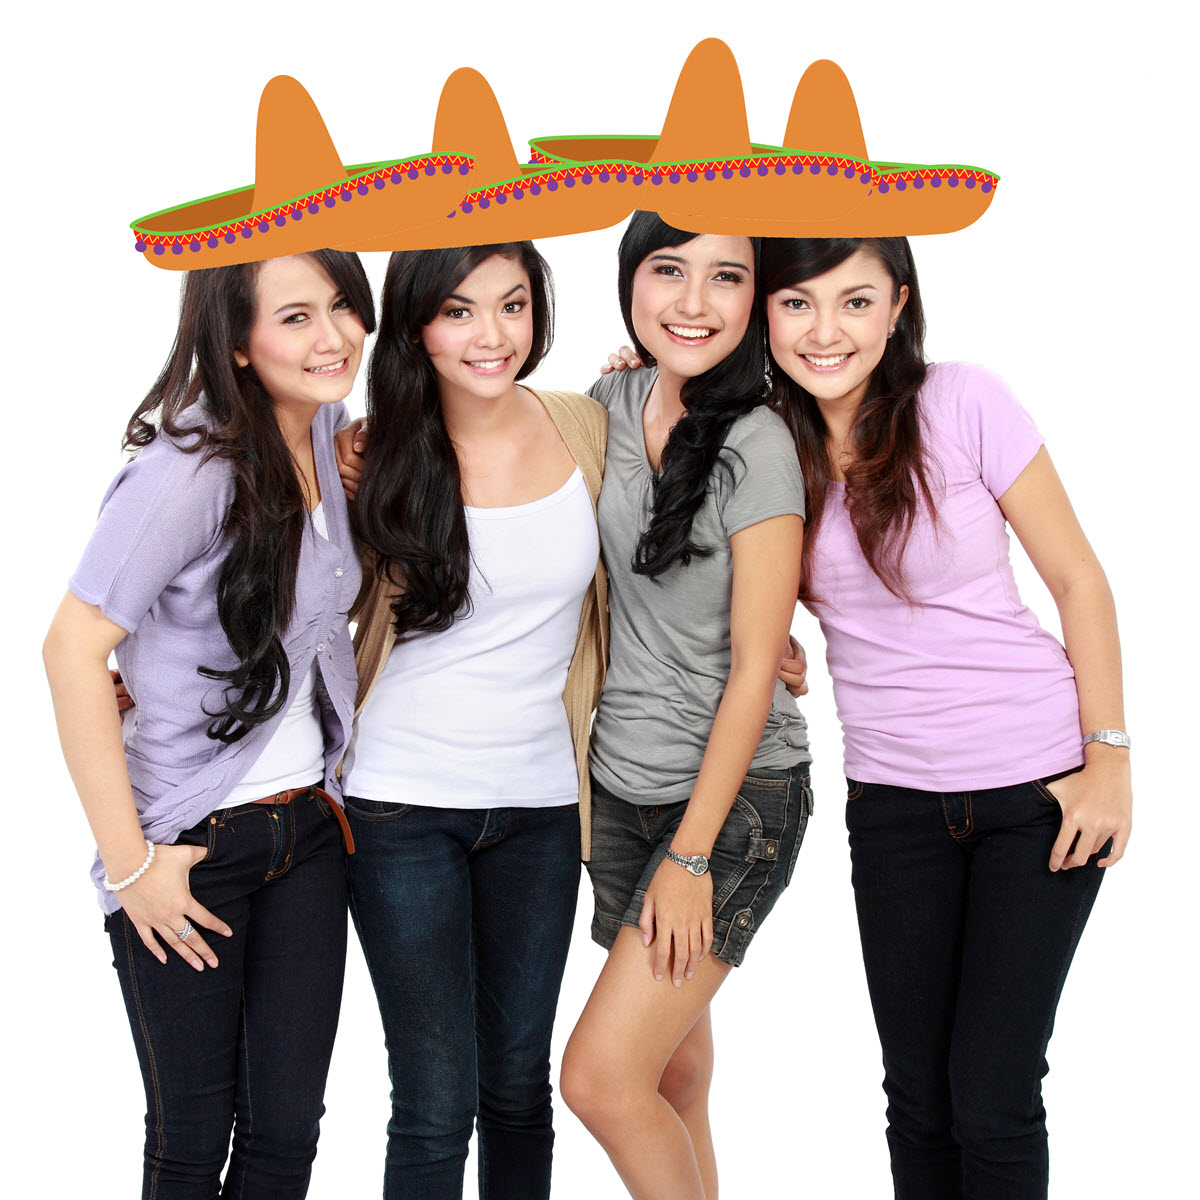
Several guests with a single prop
If necessary adjust the prop size and position in the Event Editor, then download your changes to the device.
On older devices test your event with and without High Quality Face Detection to find the best solution.
Multiple props within a photo or GIF
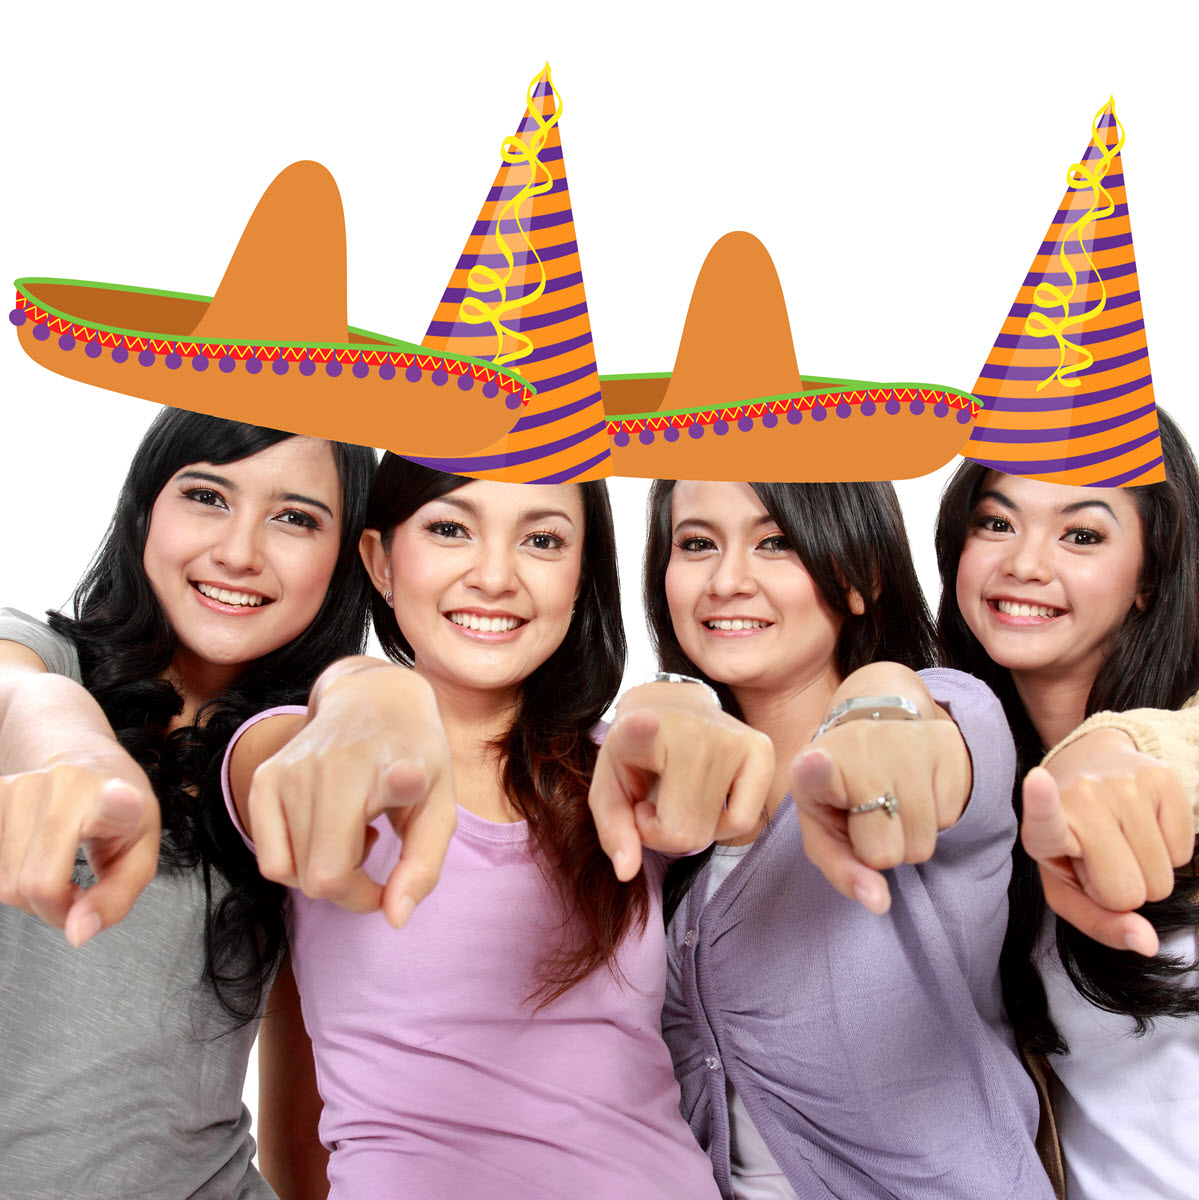
Add interest with more than one prop (Breeze Booth for iPad 1.0.4)
For two props just add two prop pngs to the screens folder. Call them
- prop1Normal1_{w48%h66%}.png
- prop1Normal2_{w48%h66%}.png
Resize and position each prop in the Virtual Prop editor as above.
Virtual Props Containing Text

Pair of mirrored virtual props (Breeze Booth for iPad 1.0.4)
If your virtual props include text, use two mirror image props so they are displayed correctly both in the live view and on prints/GIFs. Call these
- prop1Normal_{w38%h46%}.png
- prop1ReversedNormal_{w38%h46%}.png
There’s more
This tutorial doesn’t cover everything you can do with AR digital props. You can find more details ( including using special effects for smiling faces and letting guests choose which prop they want to use) in the online manual.
Try the first sample event Props and Filters for some great ideas.