This tutorial shows how to use the DSLR Remote Pro setup wizard to customize the text displayed on screen, taking you step by step through
- editing individual captions in the setup wizard
- removing unwanted captions
- creating your own caption sets in any language
- customizing captions in a pre-designed theme
- creating dynamic captions using tokens
Edit individual captions with the setup wizard
To change or remove individual captions from your screens, run the DSLR Remote Pro setup wizard and at Step 2 select Edit captions… to show the list of captions used by the program:
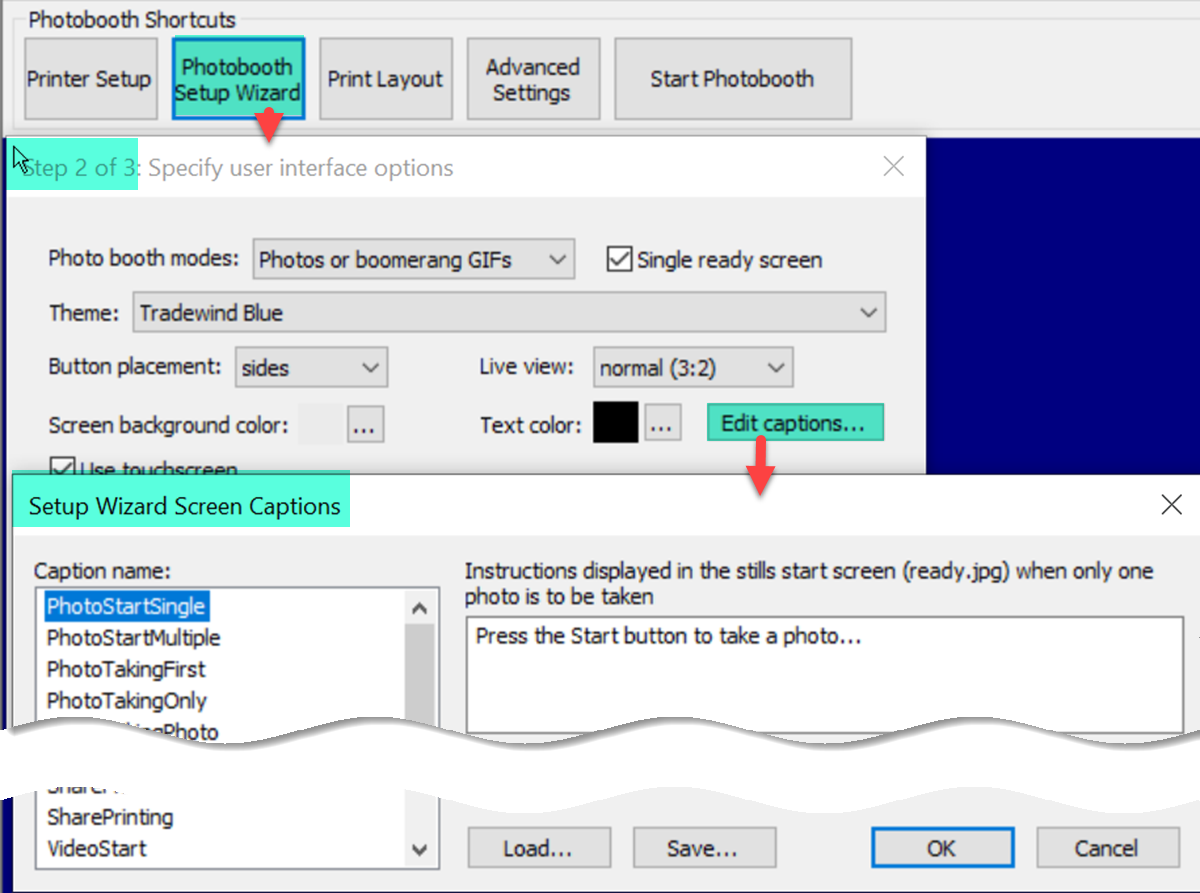
Select Edit captions… at Step 2 of the wizard to list and alter on-screen captions (Breeze DSLR Remote Pro 3.14.3). Click on any caption name to view and change the text.
You can change the text of individual captions in this window, or remove them completely. Click on any caption name to view and change the text.
Example A – ask guests to record a message for the bride and groom
In this example I used the setup wizard to set up a video booth, and replaced the original text Press the Start button to record a video.. with Record a message for the bride and groom
1. Run the wizard and select Edit captions at Step 2
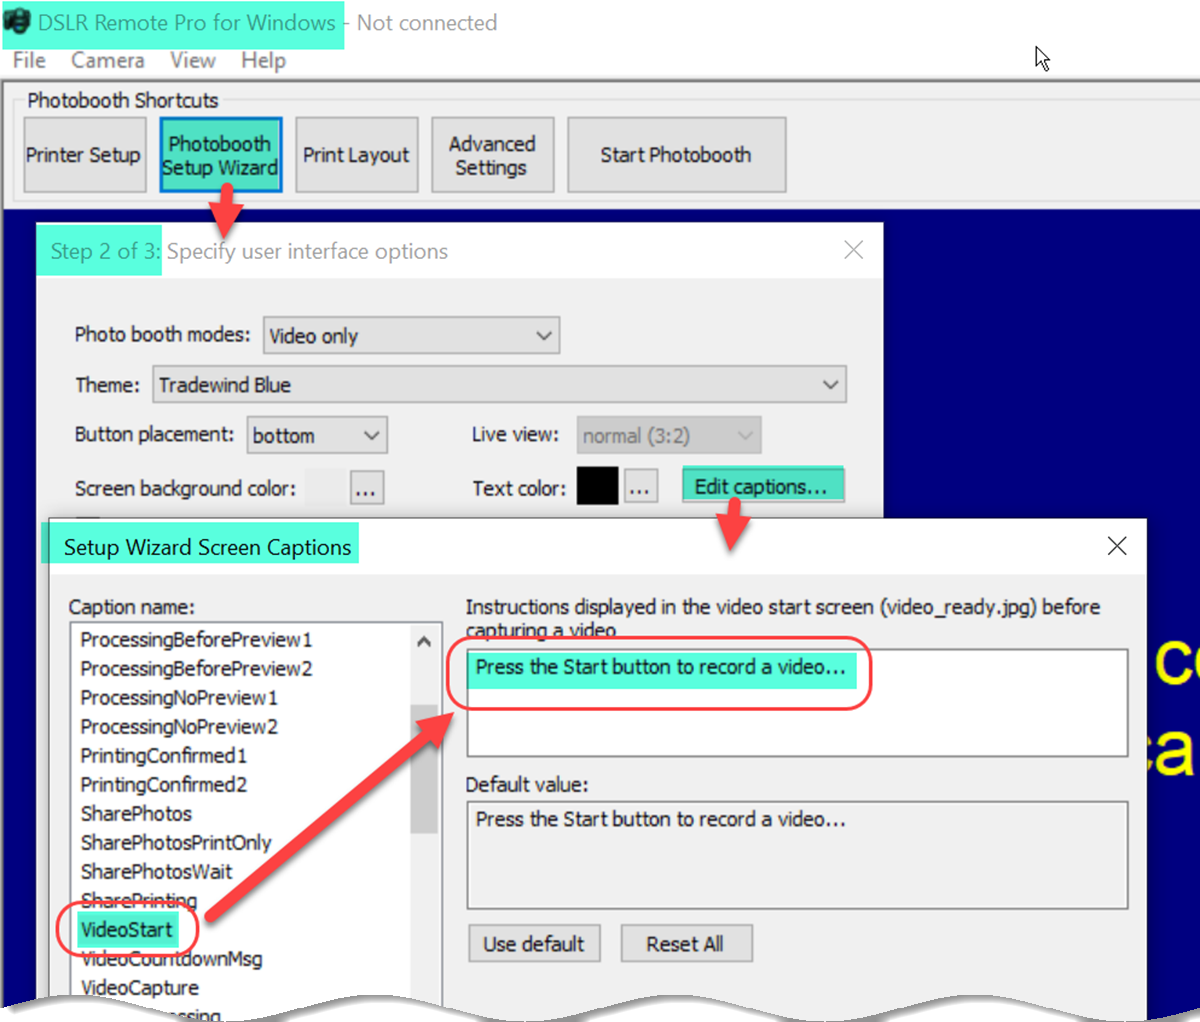
Setup Wizard showing default caption for VideoStart (Breeze DSLR Remote Pro 3.14.3)
2. Select the VideoStart caption and change the text:
Overwrite the text for each caption you want to change:
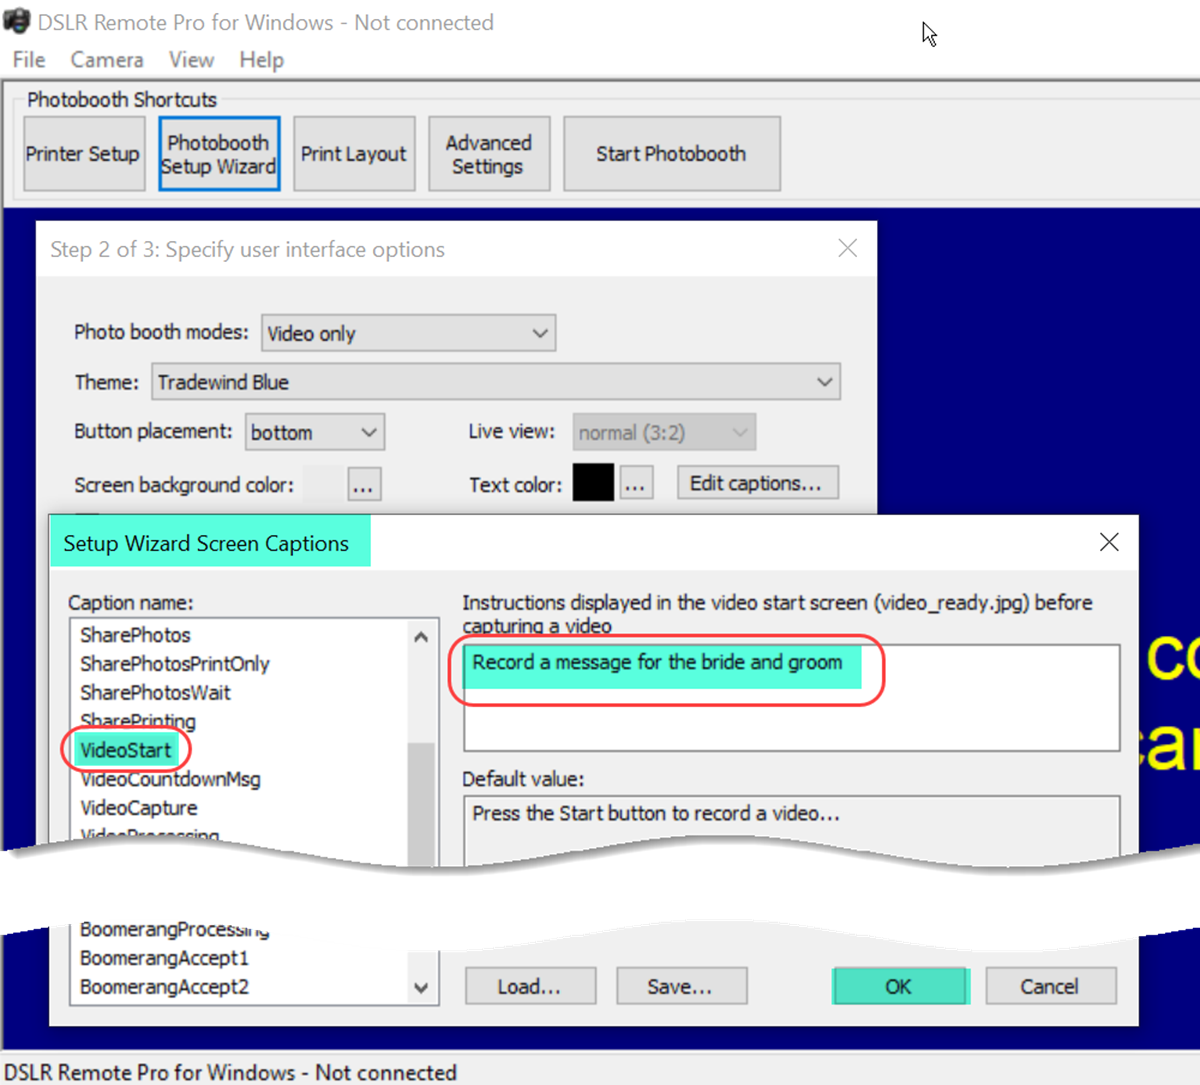
New custom caption for VideoStart (Breeze DSLR Remote Pro 3.14.3)
When you have finshed changing the captions, exither exit the caption screen with the OK button, or use the Save… button to save the new caption set for reuse.
3. Complete the setup wizard
Finish running steps 2 and 3 of the setup wizard
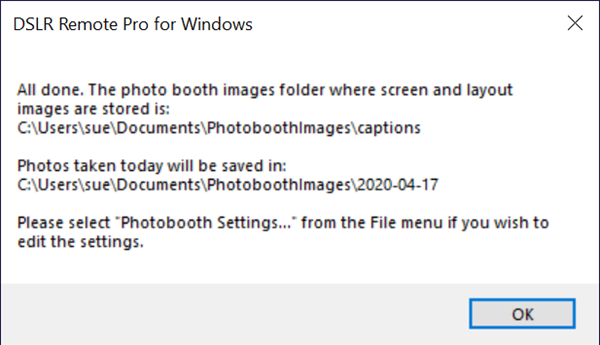
Message confirming the setup wizard has been completed (DSLR Remote Pro 3.14.3)
The wizard has created a full set of screens for the booth, including my captions. These are stored in the Photoboothimages folder.
4. Run the booth to check your changes have worked:
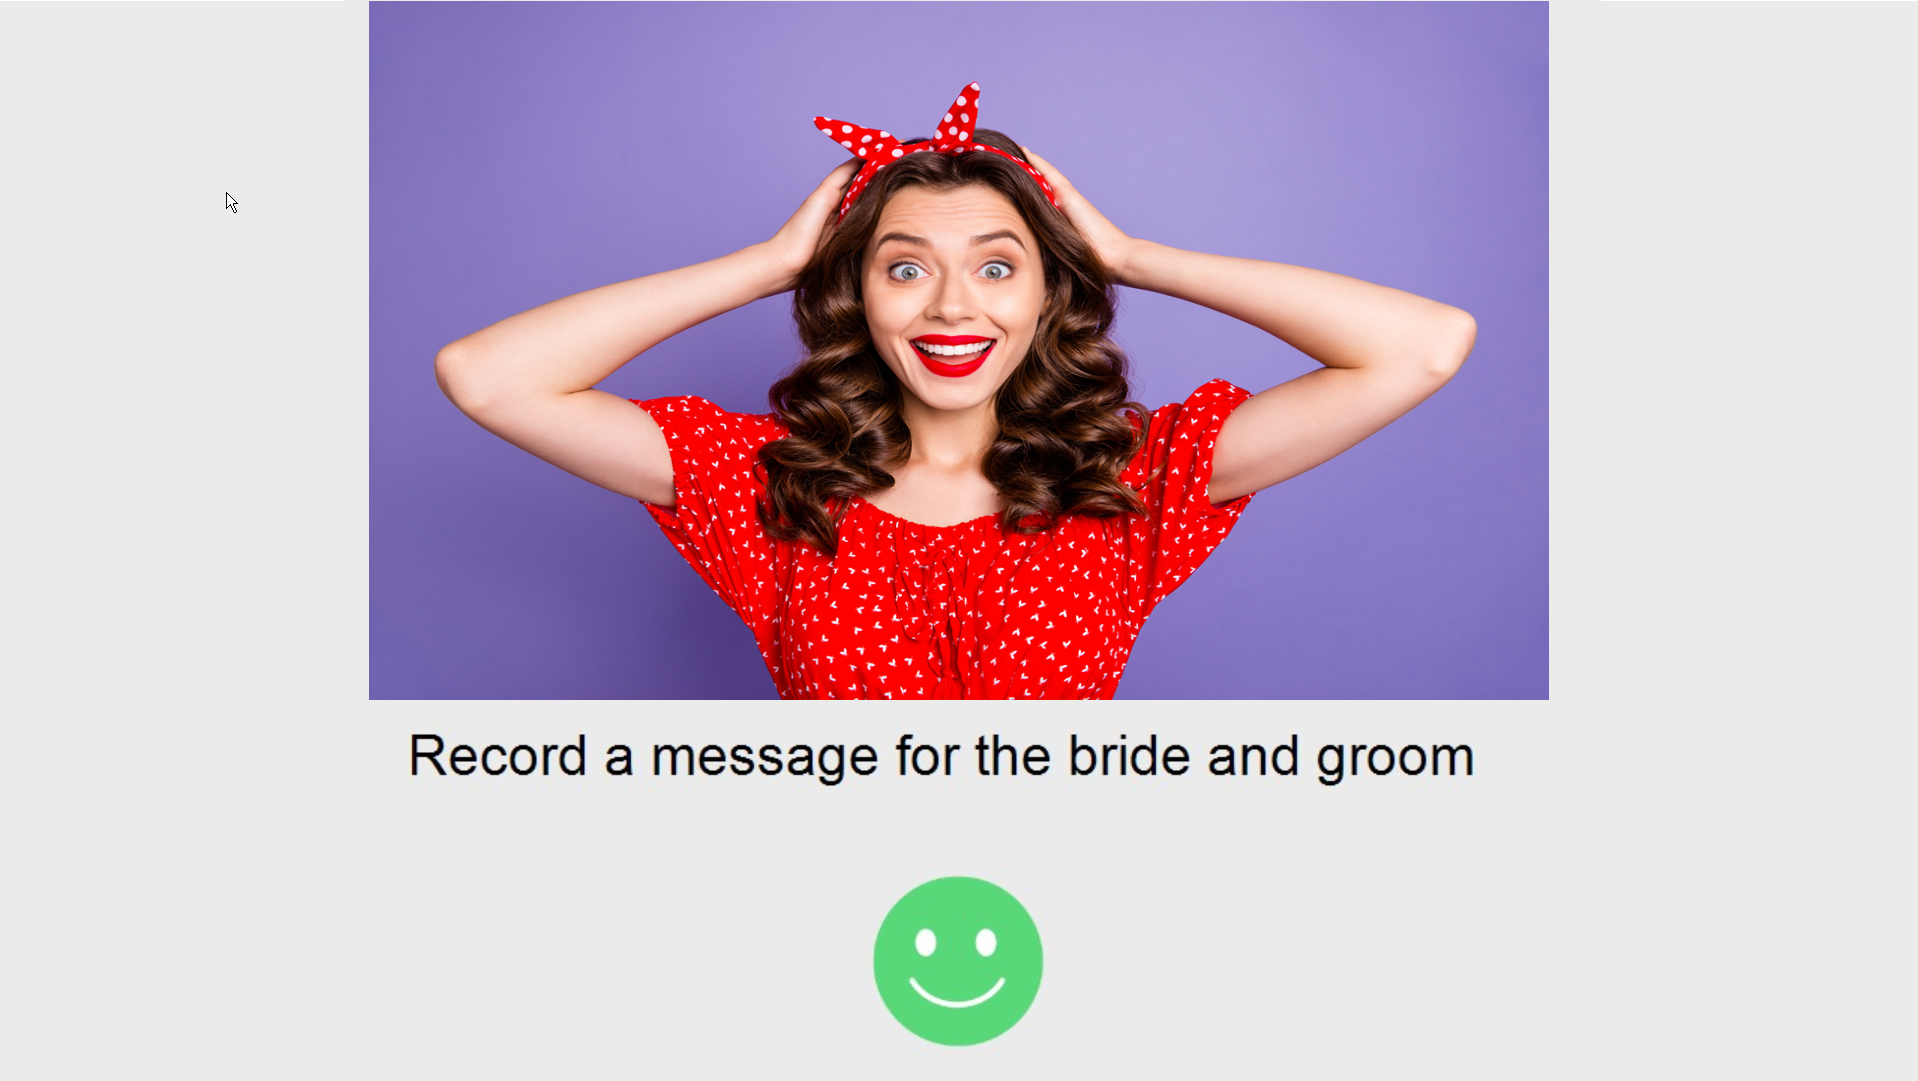
VideoStart screen showing the custom caption (Breeze DSLR Remote Pro 3.14.3)
Example B – remove a caption
A clear graphical interface may not need many captions. Simply delete the text from any caption you don’t want:
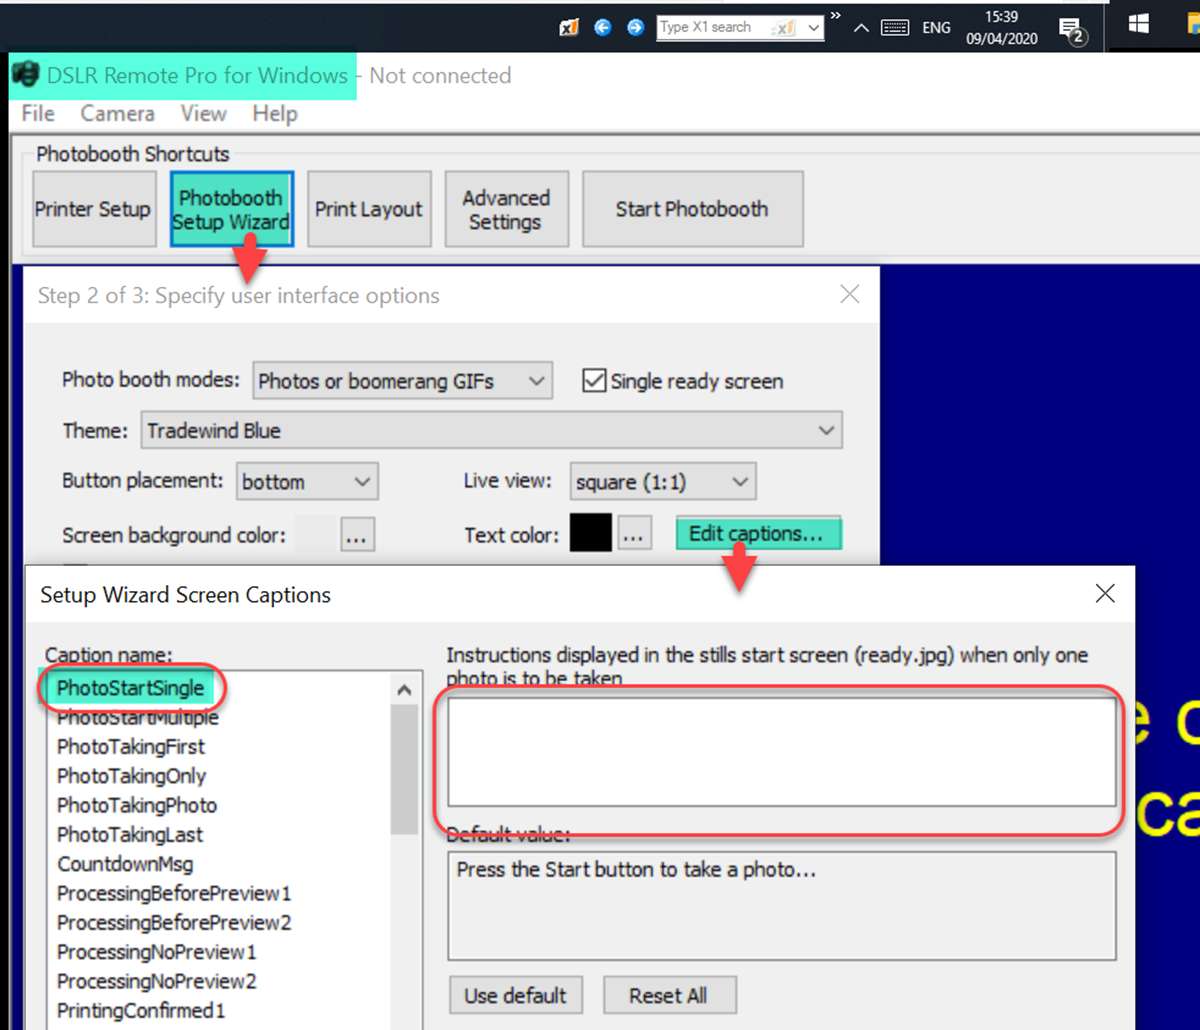
Removing a redundant caption from the Ready screen (Breeze DSLR Remote Pro 3.14.3)
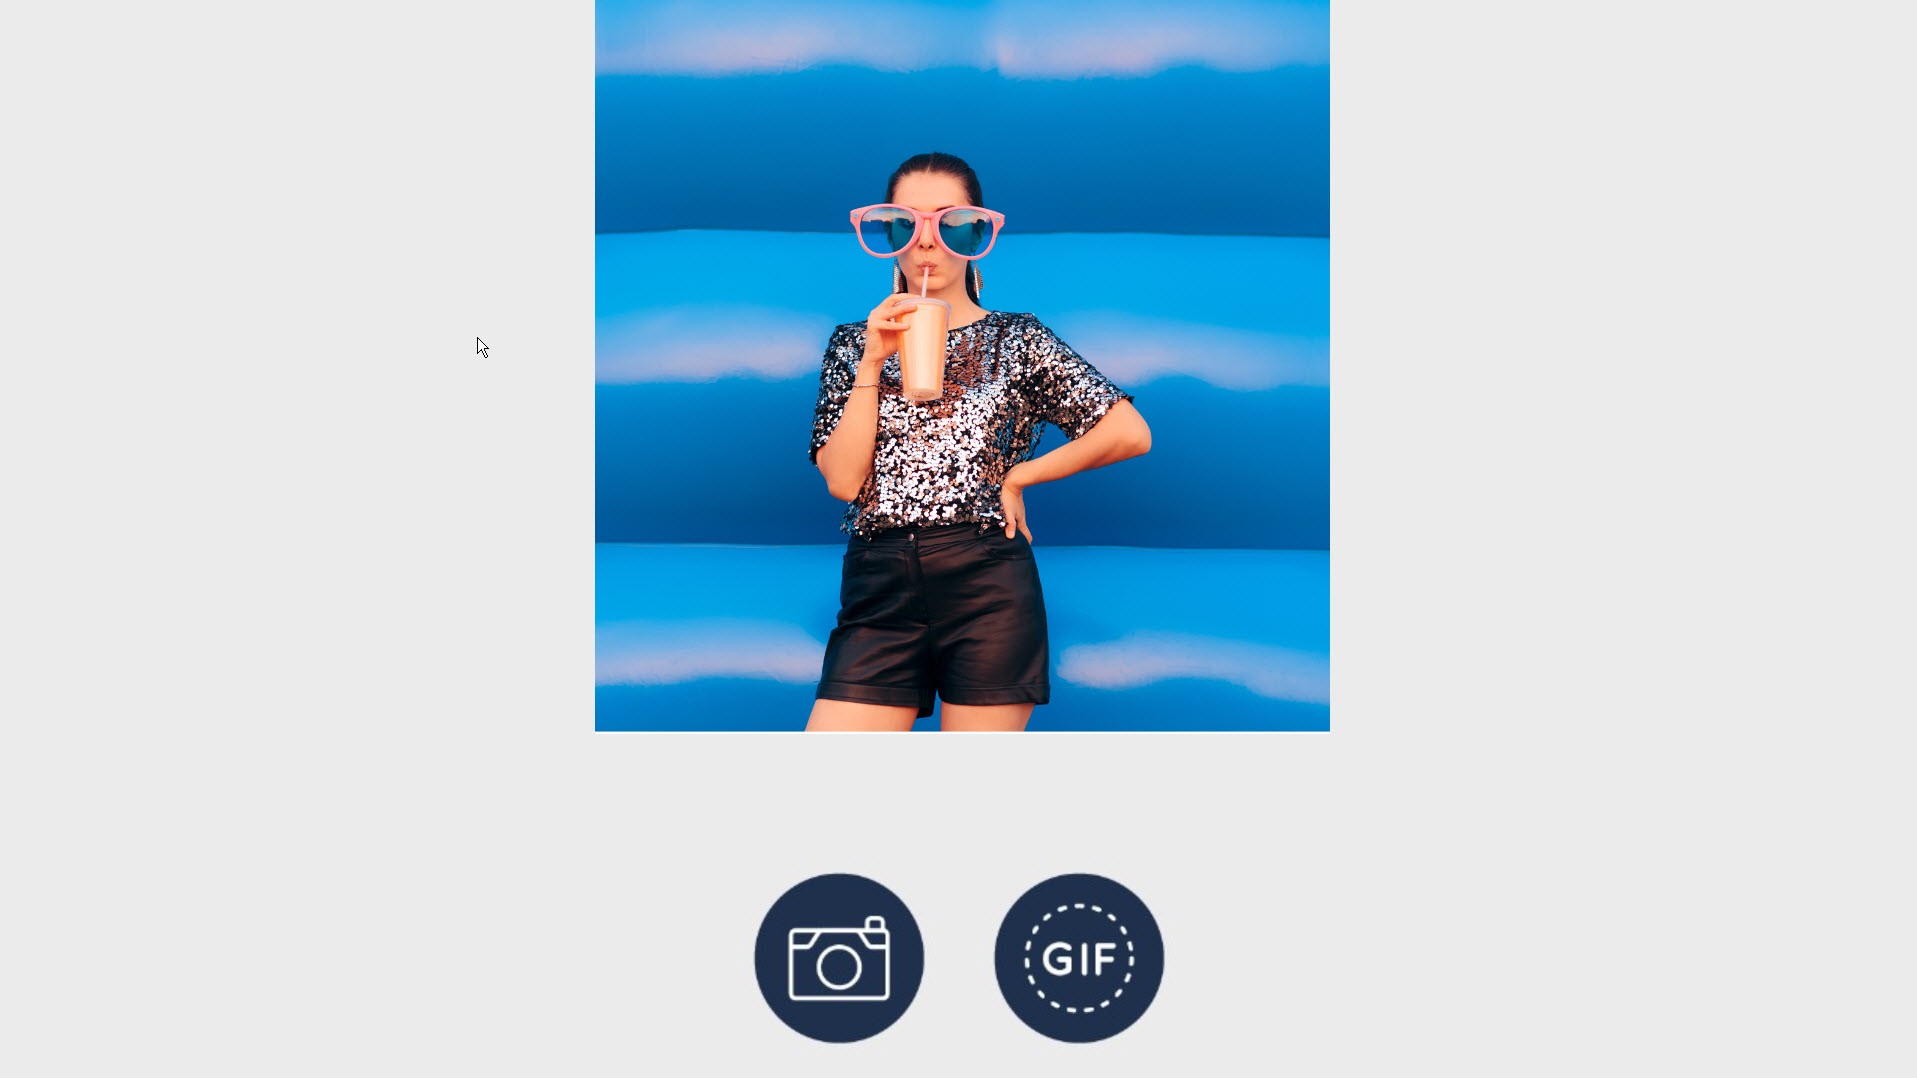
This ready screen doesn’t need a caption (Breeze DSLR Remote Pro 3.14.3)
Build and use complete caption sets
So far, I have changed a single caption. You can replace all the caption text with your own versions – allowing you to use local language(s) and wording to suit your in-house style.
DSLR Remote Pro can store multiple caption sets. Remember to use meaningful filenames so you can identify them later.
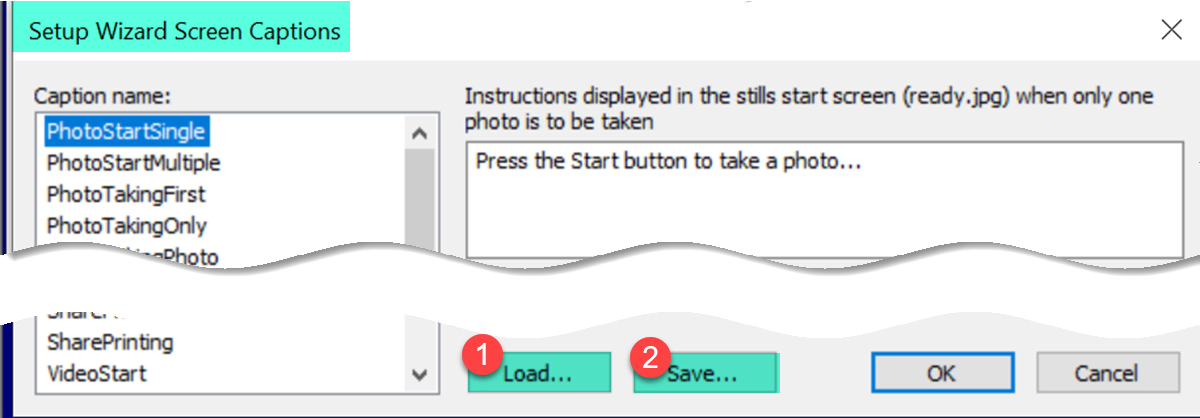
Load(1) and Save(2) buttons for caption sets (Breeze DSLR Remote Pro 3.14.3)
When you save your caption set you will be prompted for the directory and filename
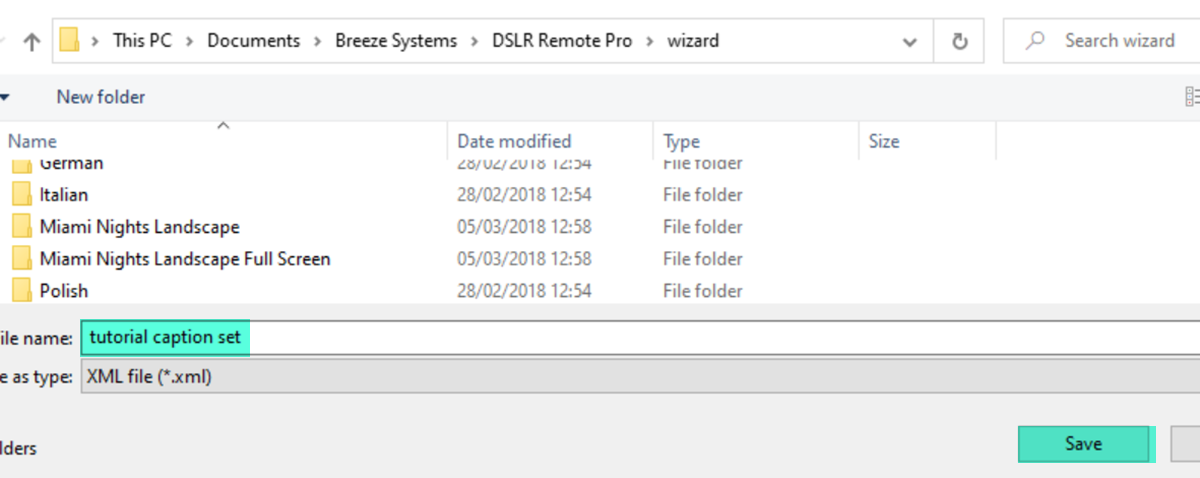
Saving a custom caption set (DSLR Remote Pro 3.14.3)
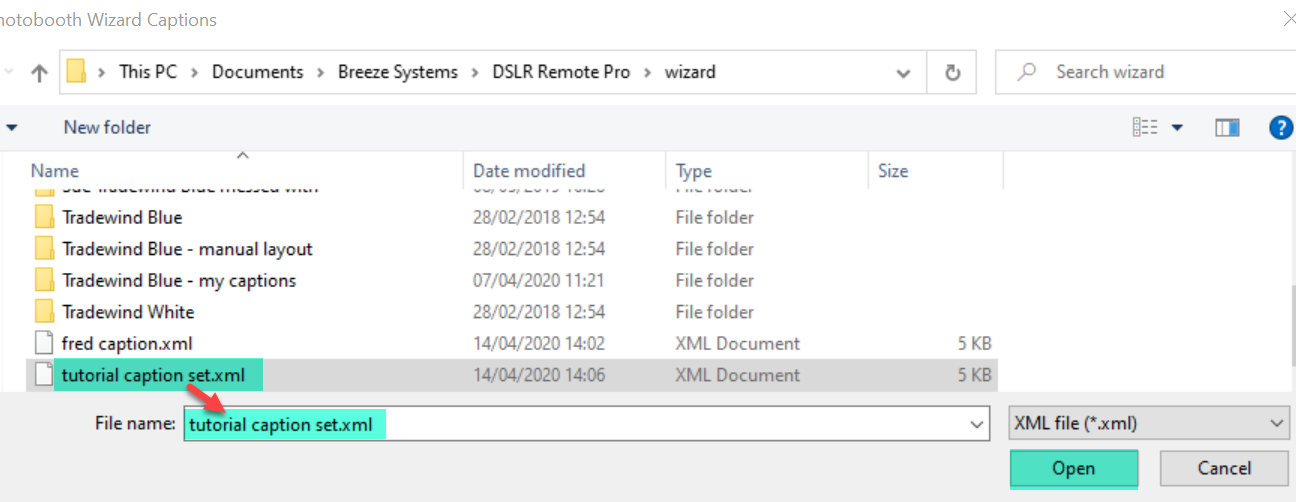
Loading a caption set into DSLR Remote Pro (v3.14.3)
Using caption sets in any language
DSLR Remote Pro defaults to English captions as standard. German, Italian, Polish, Romanian and Spanish caption sets are also provided. You can use these with pre-designed themes shipped with the product such as Tradewind White. You can also include any of these caption sets in your own or third party themes.
DSLR Remote Pro stores the standard themes and caption sets in the program installation folder C:\Program Files (x86)\BreezeSys\DSLR Remote Pro\Wizard .
We suggest you copy the contents of this folder to a new folder called C:\Users\…\Documents\Breeze Systems\DSLR Remote Pro\wizard .
- Create a subfolder in your Documents folder \Breeze Systems\DSLR Remote Pro\wizard
- Copy the master set of themes and captions from C:\Program Files (x86)\Breezesys\DSLR Remote Pro\wizard to C:\Users\…\Documents\Breeze Systems\DSLR Remote Pro\wizard
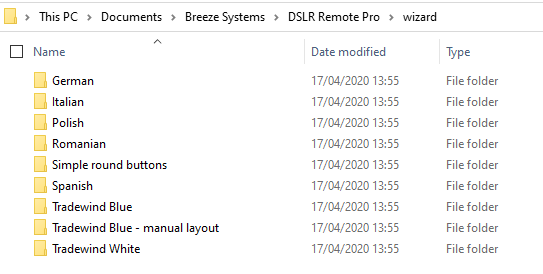
Copy of the original wizard folder containing the themes and caption sets provided as standard with Breeze DLSR Remote Pro 3.14.3
You can clone a theme and add your chosen caption set to the new theme, or import a pre-written caption set into your copy of the program.
Example C – Creating a version of Tradewind White theme with German captions
- Clone the theme, then
- Copy the caption set you want to use into this theme
First take a copy of the Tradewind White folder in C:\Users\…\Documents\Breeze Systems\DSLR Remote Pro\wizard
This creates a new theme which you can see when you run the DSLR Remote Pro setup wizard. Give the new theme/folder a memorable name. I have called mine Tradewind White – German captions
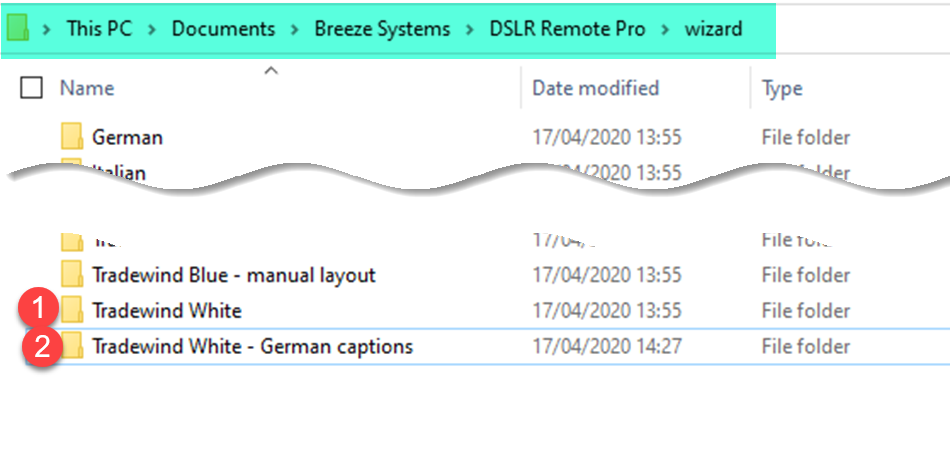
The wizard folder now contains both the original Tradewind White theme (1), and my copy of this theme called Tradewind White – German captions (2)
You have created a new theme called Tradewind White – German captions. Now copy the German caption set captions.xml from C:\Users\sue\Documents\Breeze Systems\DSLR Remote Pro\wizard\German into your new theme folder
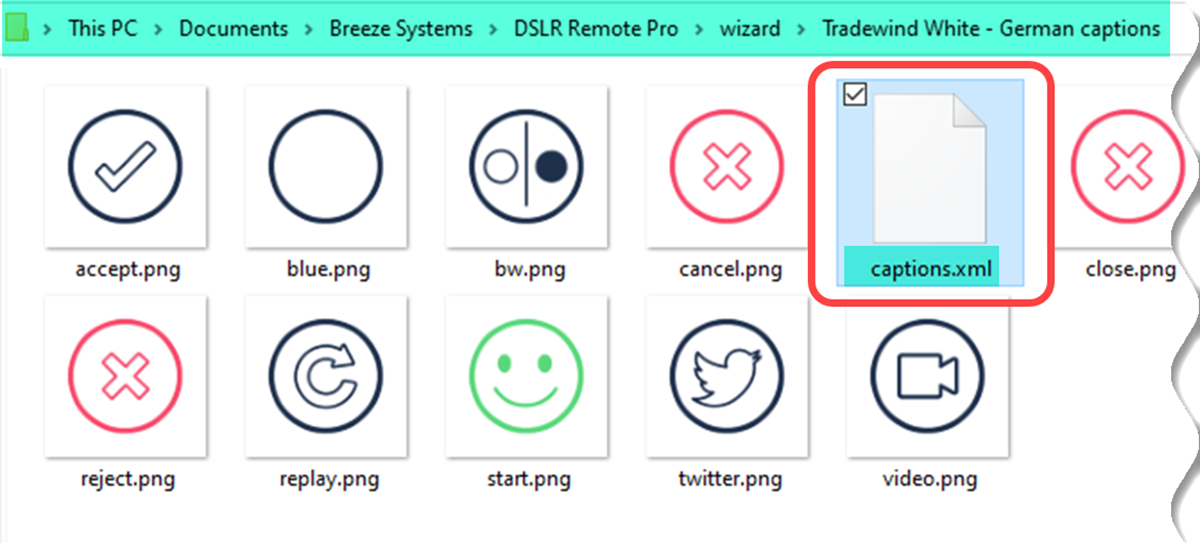
New theme folder with captions set captions.xml
Run the wizard and use your new theme
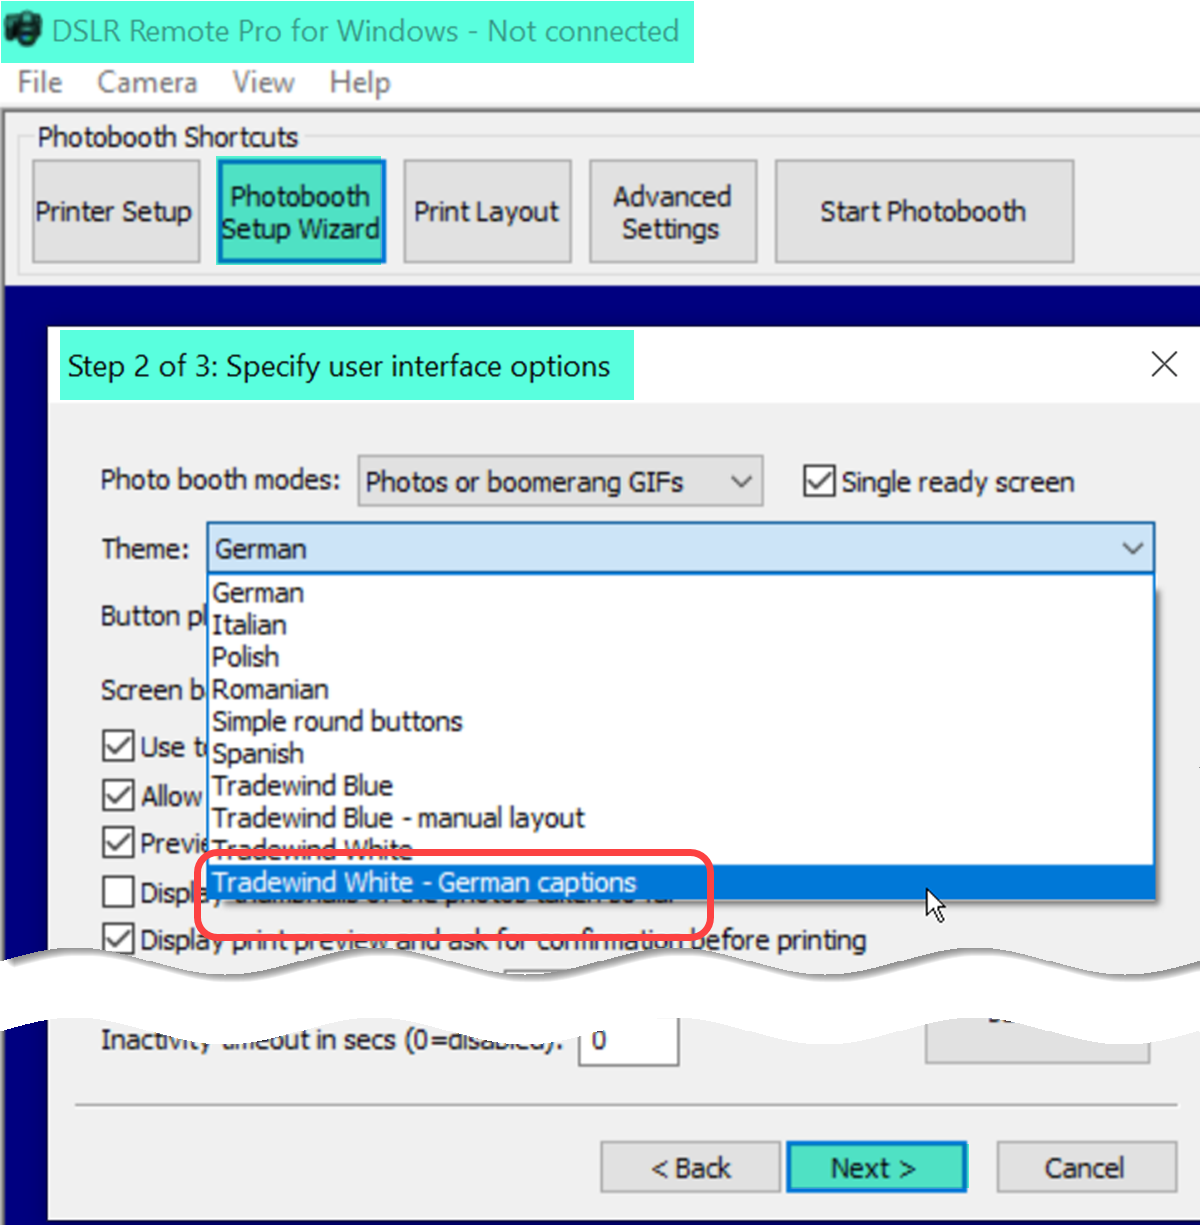
Selecting my new theme at Step 2 of the setup wizard (DSLR Remote Pro 3.14.3)
Choose the theme and finish running the wizard.
Run the booth to check your changes have worked:
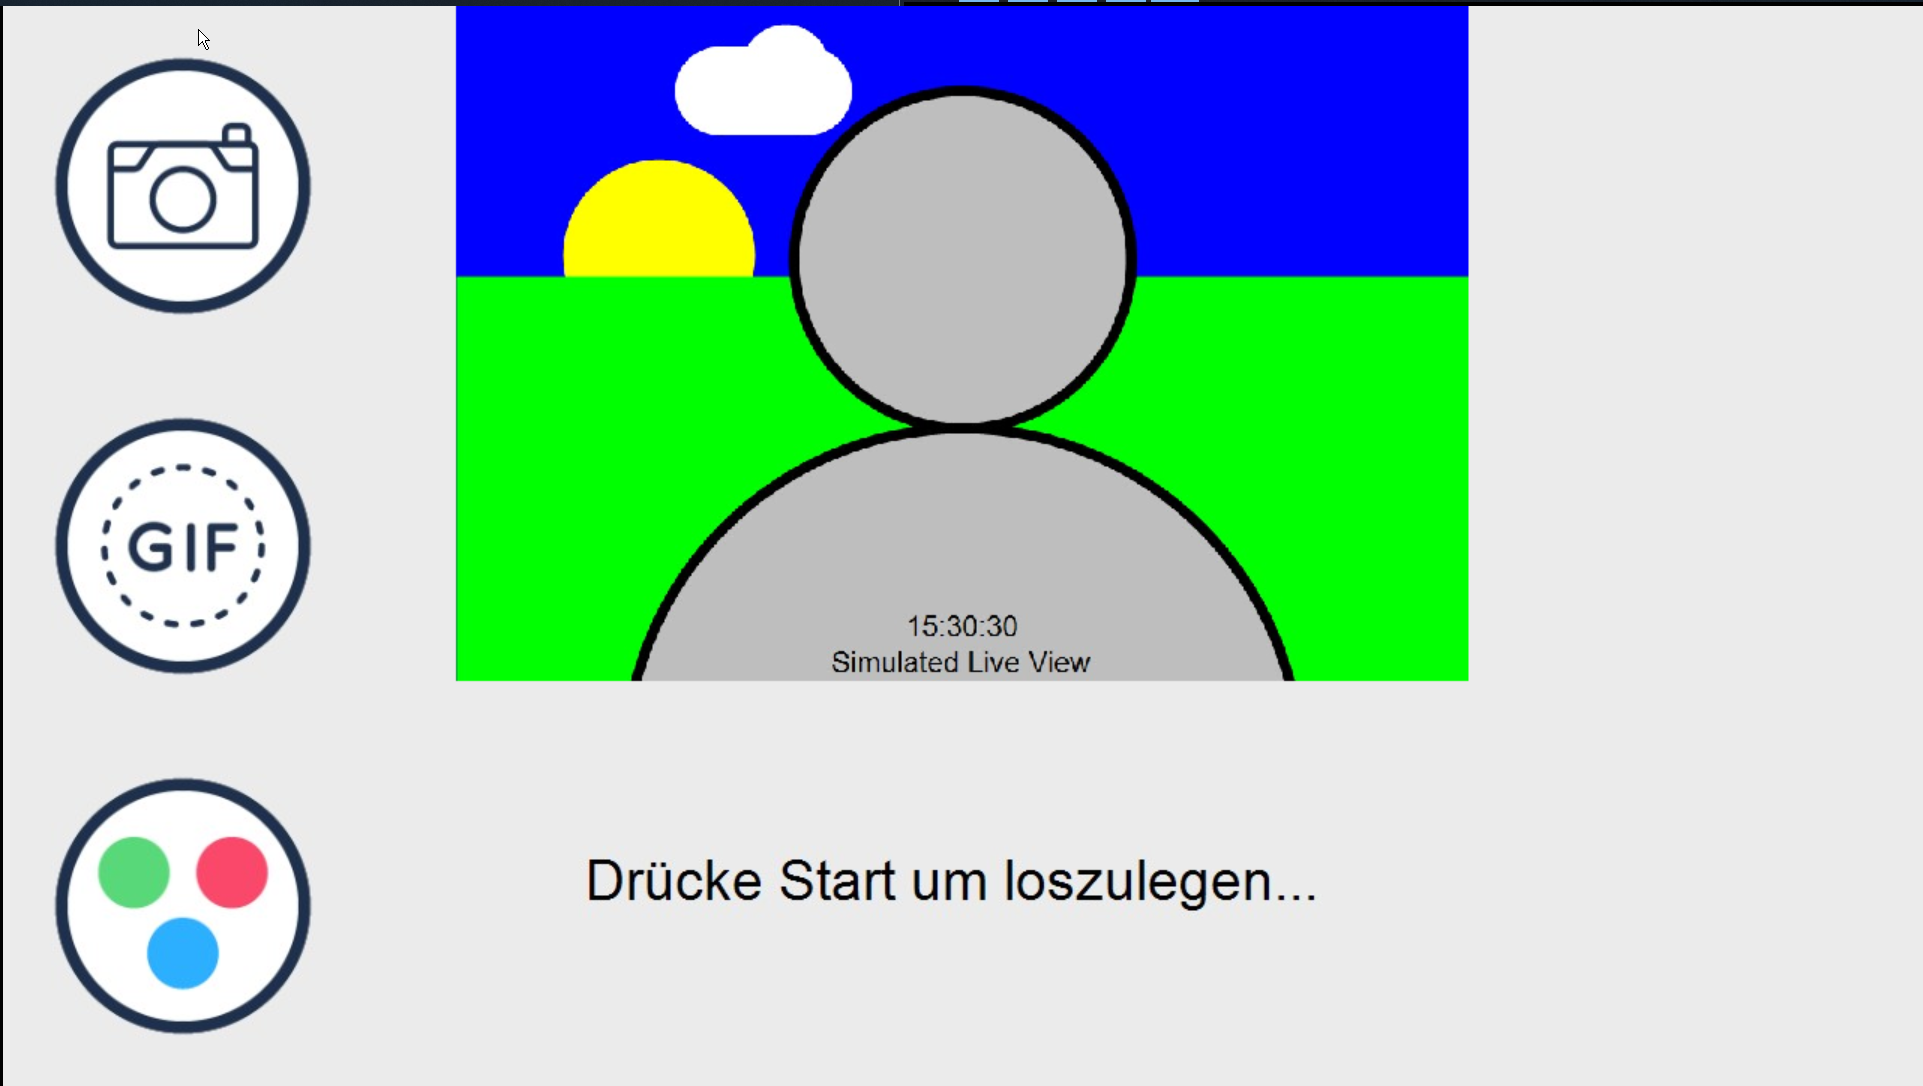
New ready screen using German captions (DSLR Remote Pro 3.14.3)
Depending on your workflow, you may find it easier to load a caption set into a pre-existing theme when you run the wizard
Example D – importing a caption set into the program
Run the wizard, selecting a theme as usual. At Step 2, go to Edit captions.. and load any of the standard caption sets into the program:
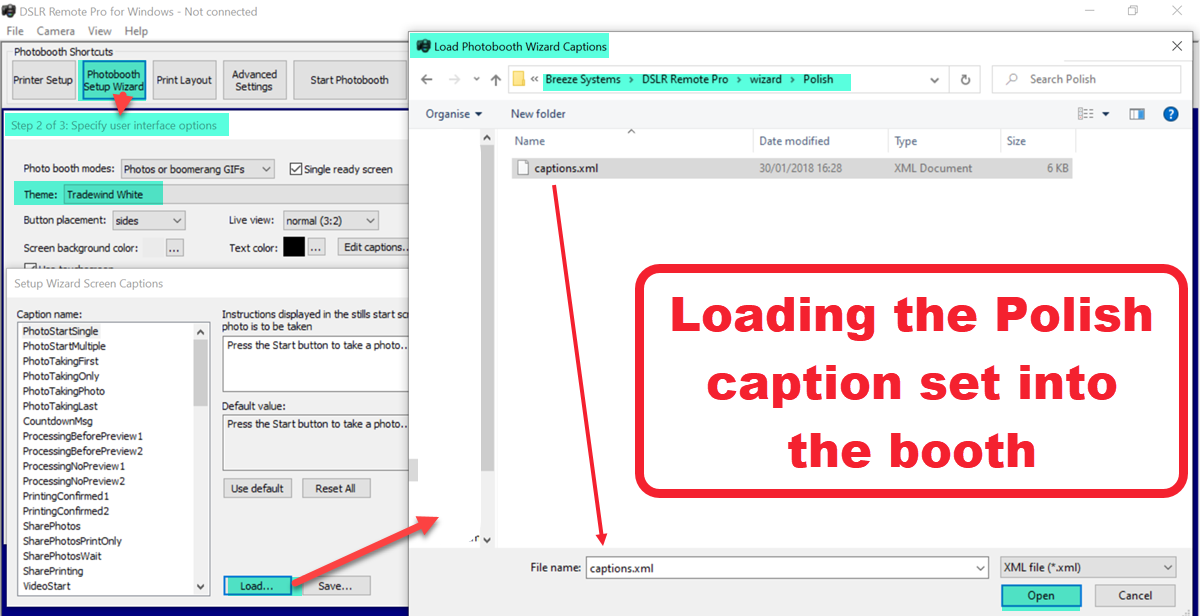
Loading the Polish caption set into DSLR Remote Pro 3.14.3
After loading your caption set, finish running the wizard and run the booth to check that your changes worked.
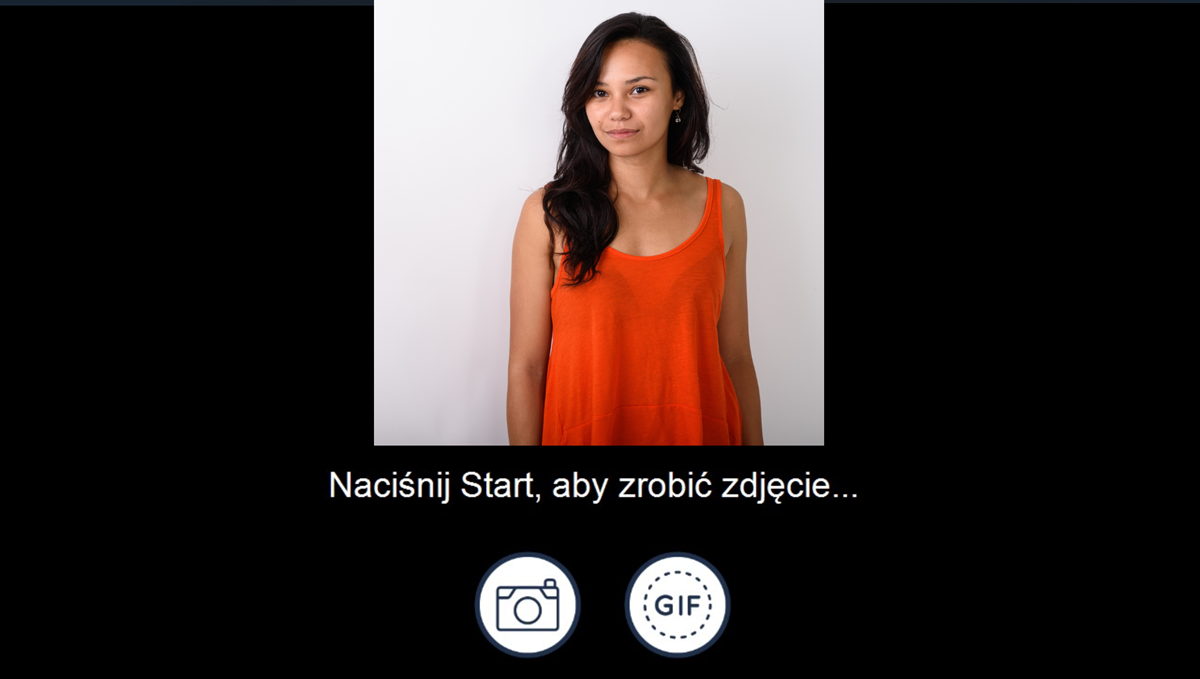
Ready screen wih Polish captions created by the wizard ( DSLR Remote Pro 3.14.3)
Dynamic captions using tokens
Breeze tokens are a powerful tool to make your life simpler. If you haven’t used them before, check out the Breeze token tutorial.
You may already use tokens in print layouts, file naming and sharing text. You can also use them to customize a guest interface created by the setup wizard. Example A changed the standard caption text to “Record a message for the bride and groom”. A nice touch would be to use the bride and groom’s names instead, ie “Record a message for Helen and Andy”. Using Breeze tokens makes this easy to manage:
Example E – personalizing text with the bride and groom’s names
This example uses a Breeze token called {eventString1} to store the names of the bride and groom. I can then create screen and print captions, email and SMS/MMS text and a folder system using the same {eventString1} token.
For each event I enter the bride and groom’s names once into {eventString1}.
Rerun the wizard, click on Edit captions.. as before, and change VideoStart to Record a message for {eventString1}. Save your changes before leaving the window.

Custom caption for VideoStart using token. Here the toekn will be converted to the bride and groom’s names when the booth runs (Breeze DSLR Remote Pro 3.14.3)
Once I have set up my caption and sharing text using the token {eventString1}, I change it’s value on the Event Information screen
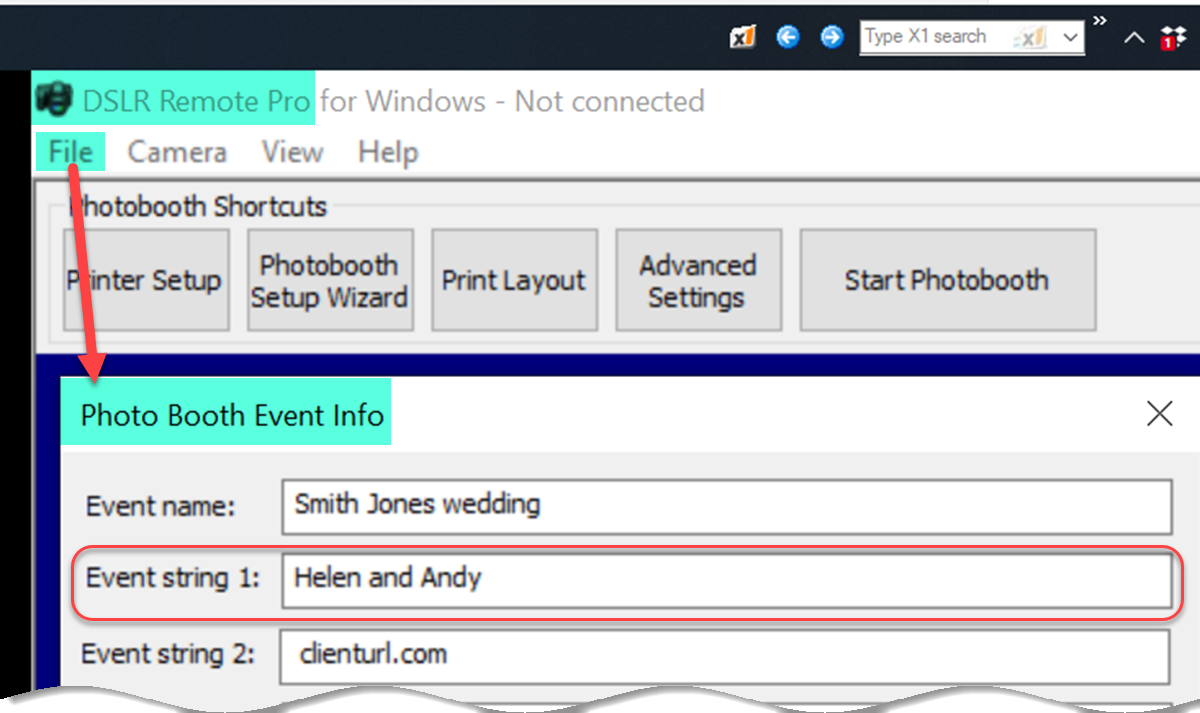
Setting the value of an event string in Breeze DSLR Remote Pro 3.14.3

Video booth with personalised screen text (Breeze DSLR Remote Pro 3.14.3)
Use the same token in your print layout, email and SMS/MMS
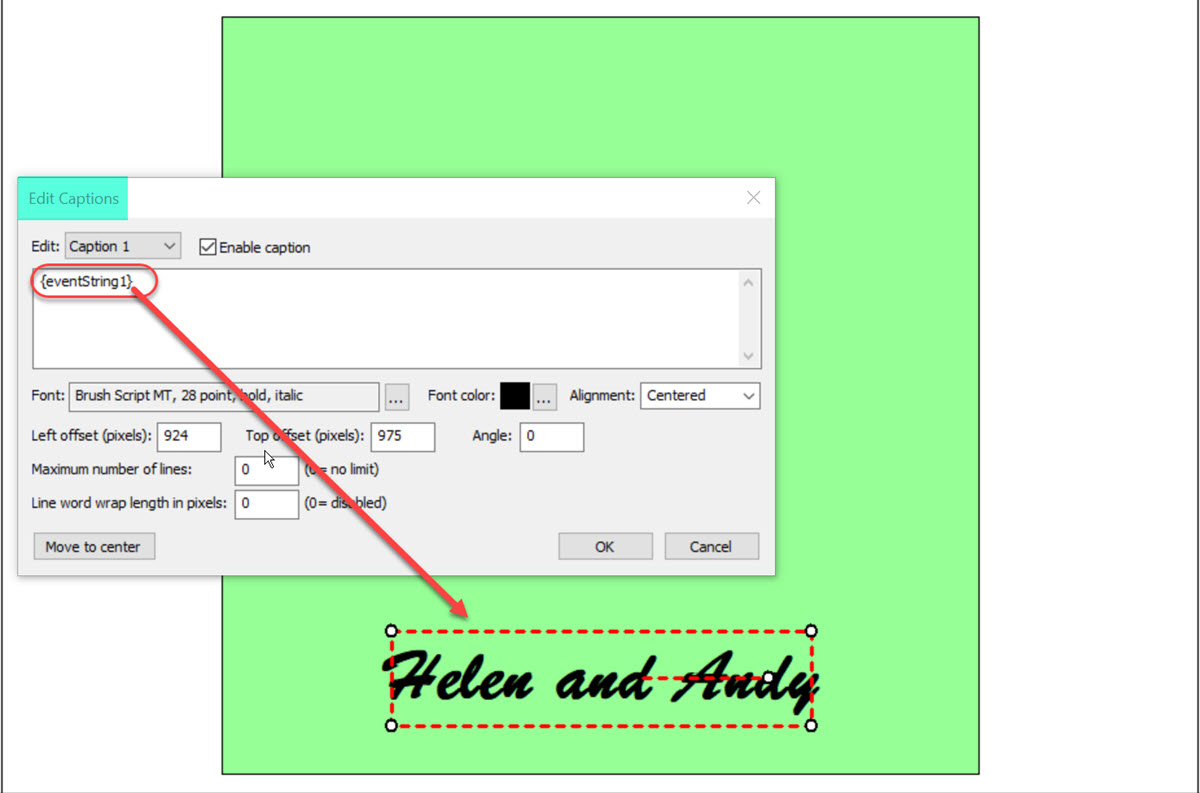
The same token {eventString1} used in a print caption (Breeze DSLR Remote Pro 3.14.3
For the next wedding, you can just change the value of {eventString1}, rerun the wizard and your screen, print and sharing text will be changed automatically:
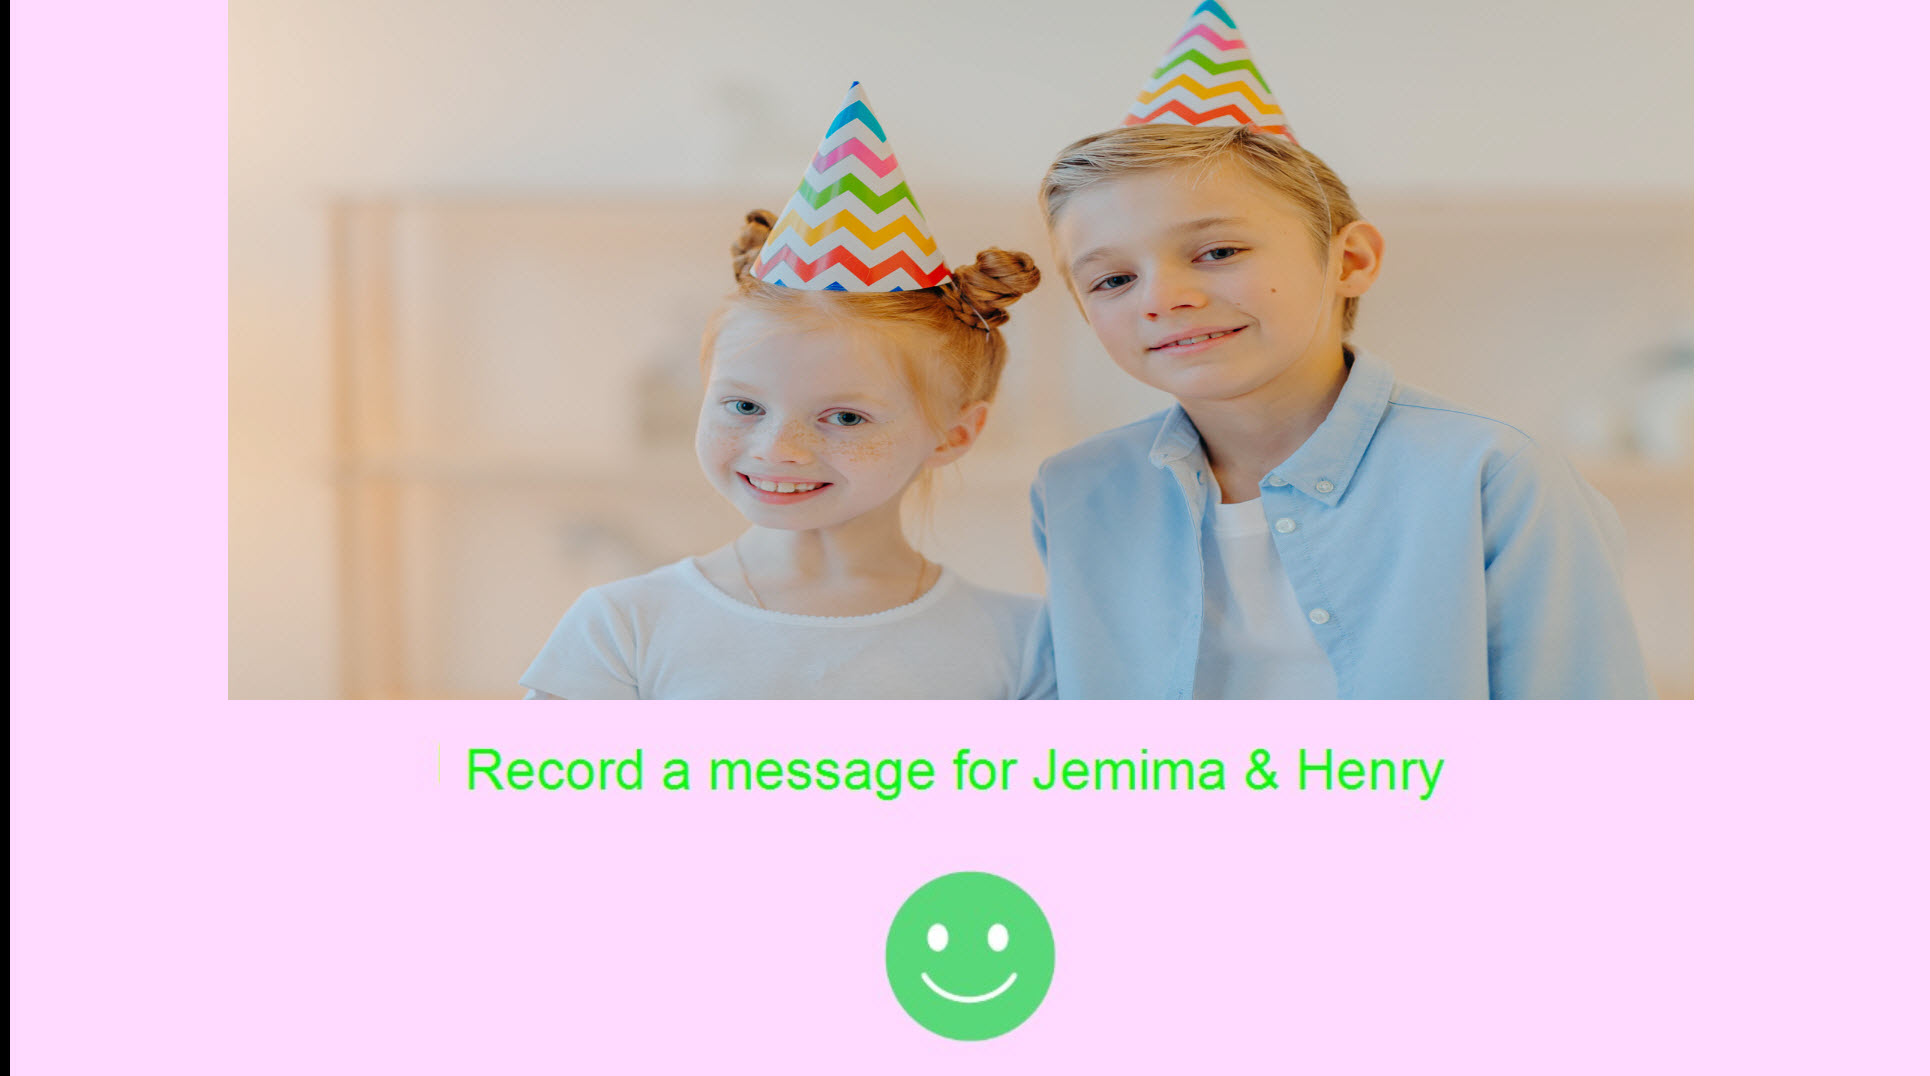
Effect of changing {eventString1} value to ‘Jemima & Henry’ (Breeze DSLR Remote Pro 3.14.3)
You can use any of these Breeze tokens to personalize the text displayed on your screens:
- {photoboothSubDir} – name of the photo booth images folder specified in step 1 of the setup wizard
- {photoboothNumImages} – number of photos to be taken in stills photo booth mode
- {themeName} – name of the theme selected in step 2 of the setup wizard
- {eventName} – name of the event. Set and change this yourself in the event info screen
- {eventString1}, {eventString2}, {eventString3}, {eventString4}, {eventString5} – set & change these using the event info screen
Learn more about using eventName and event strings here
More about the setup wizard
Each time you run the setup wizard it builds a set of screens and instructions for the booth, which are saved in the Photoboothimages folder.
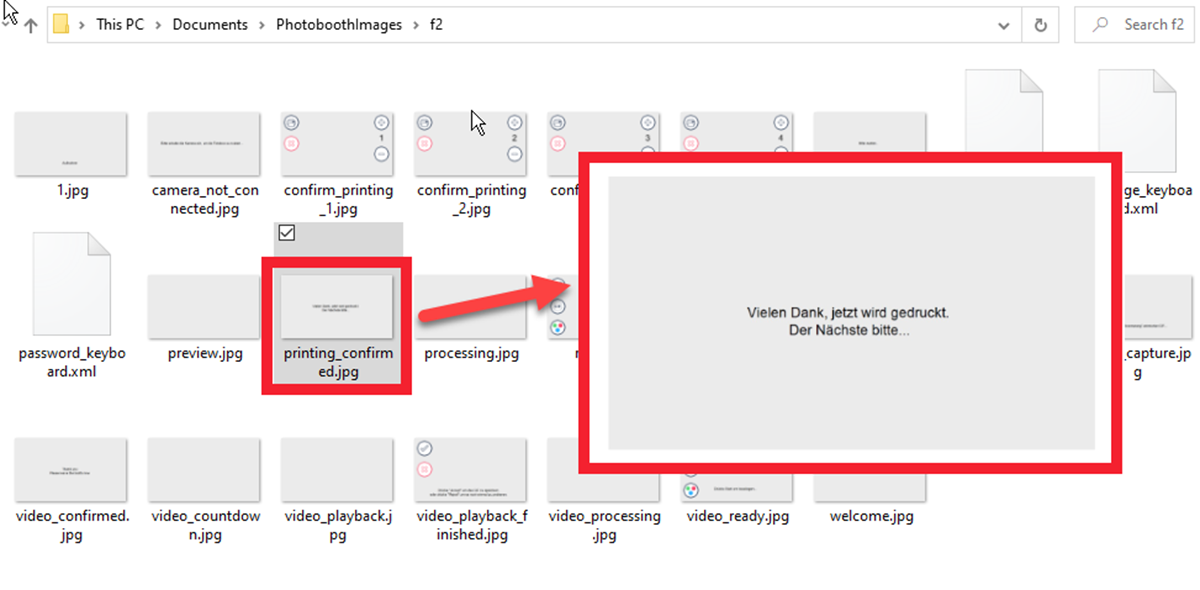
Photoboothimages folder highlighting printing_confirmed. jpg ie print confirmation screen (DSLR Remote Pro 3.14.3)
Each screen background is saved as a jpg image, which includes the caption generated from the caption set you are using.
You can replace any (or all) of these images with your own designs. The replacements should
- be the same size in pixels as the original
- have exactly the same name
If you replace the print confirmation screen shown above the new version must be called printing_confirmed. jpg and be the same size in pixels as the original.
Changing screen captions without running the setup wizard
You can change these captions without running the setup wizard by replacing the original jpg image with your own version.
You can also animate text and images using GIFs and movies on many screens. This is outside the scope of this tutorial. More details.
Summary
This tutorial has shown how create a guest interface with custom text using DSLR Remote Pro’s powerful setup wizard.
© Breeze Systems 2020