Post Covid touch free booths have great appeal. A partial or entirely contactless booth is hygienic and a great way to improve the guest experience
Last updated: August 2023
Like magic, but more hygienic. The complete photo booth experience without touching the booth. Breeze touch free booth software takes and shares photos, GIFs and video without guests or an attendant touching it.
Note: DSLR Remote Pro 3.15.1 fixed an issue scanning QR codes in the sharing screen after a boomerang or video booth session
Use any Canon DSLR/mirrorless camera supported by DSLR Remote Pro to shoot your photos/GIFs/video as usual. Not all Canon cameras can capture the QR codes, so you may need to use a web camera as well.
1.Set the camera to AF:
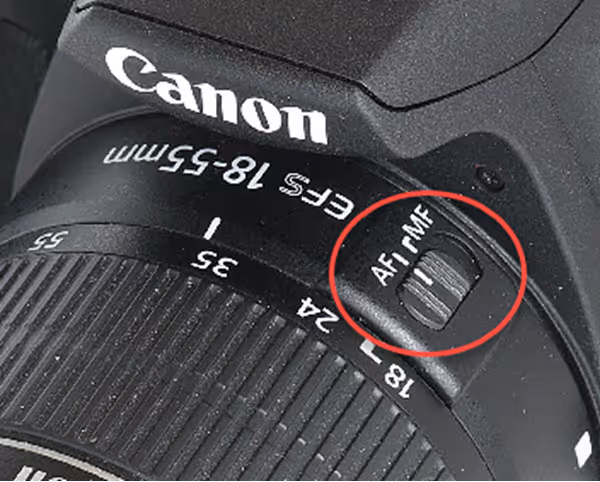
Set the camera to AF to run contactless (DSLR Remote Pro 3.15)
2.Connect the cameras and put it into continuous AF and face detect
For more details see the Auto Focus section of Photo Booth Shooting Camera Settings
If you don’t have a dual pixel focus DSLR/mirrorless camera in the booth, you need a web camera to capture the QR codes. You can use the web cam built into the PC or add a separate web cam such as the Logitech C920.
The webcam is only used to scan QR codes, you still need a supported Canon camera to take the photos/GIFs/videos.
You also need to run Webcam QR Code Scanner program which is automatically downloaded with DSLR Remote Pro 3.15.
You can add contactless entry to an existing DSLR Remote Pro event, or start from scratch.
You will need to
Your ready screen(s) must have touchscreen actions defined for Select photobooth+start and Select video booth+start.
Profiles users must follow these steps for every profile you need to run contactless.
Tell DSLR Remote Pro to read QR codes, and check the touch screen settings for each Ready screen you are using
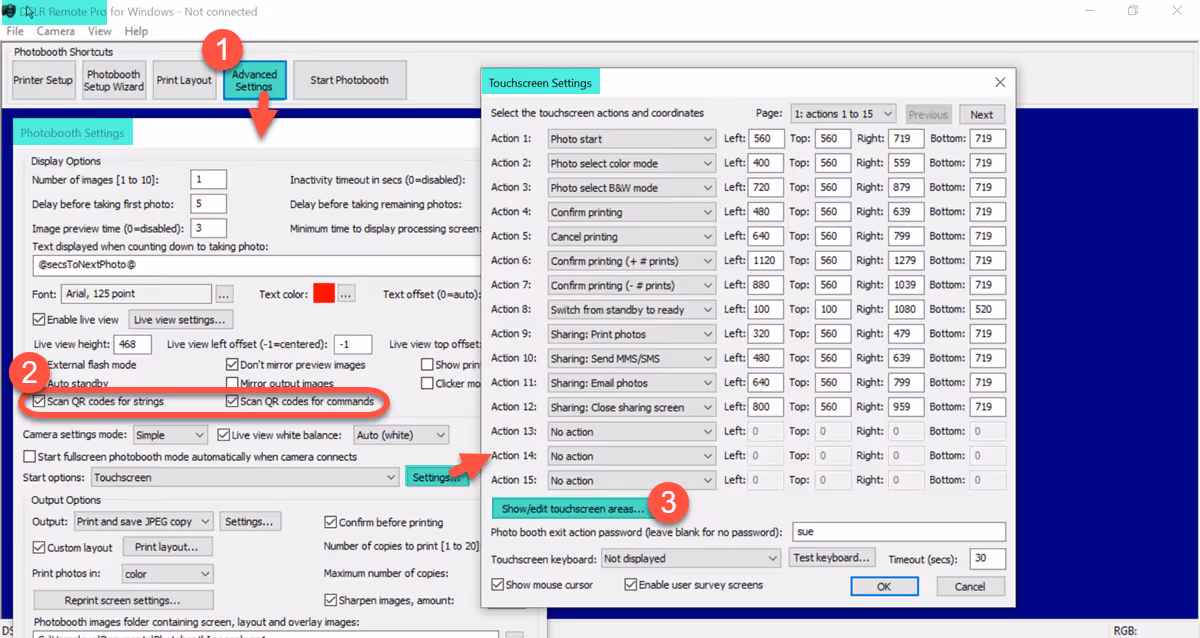
Select (1) Advanced Settings, (2) Check QR codes for strings and Scan QR codes for commands, then (3) go to the Touchscreen settings (DSLR Remote Pro 3.15)
(1) Go to Advanced Settings
(2) Check the boxes Scan QR codes for strings and Scan QR codes for commands*.
(3) Go to the touch screen settings to check you have the correct actions on your screens
* Advanced users: Do this for each profile where you want to use QR codes.
If your ready screen does not already have the correct action, you need to add it.
Right click on the screen and select Add action..

This stills ready screen uses Photo start, so you need to add the Select photobooth+start action. Right click on the ready screen to add this.
Choose Select photobooth+start from the drop down list:
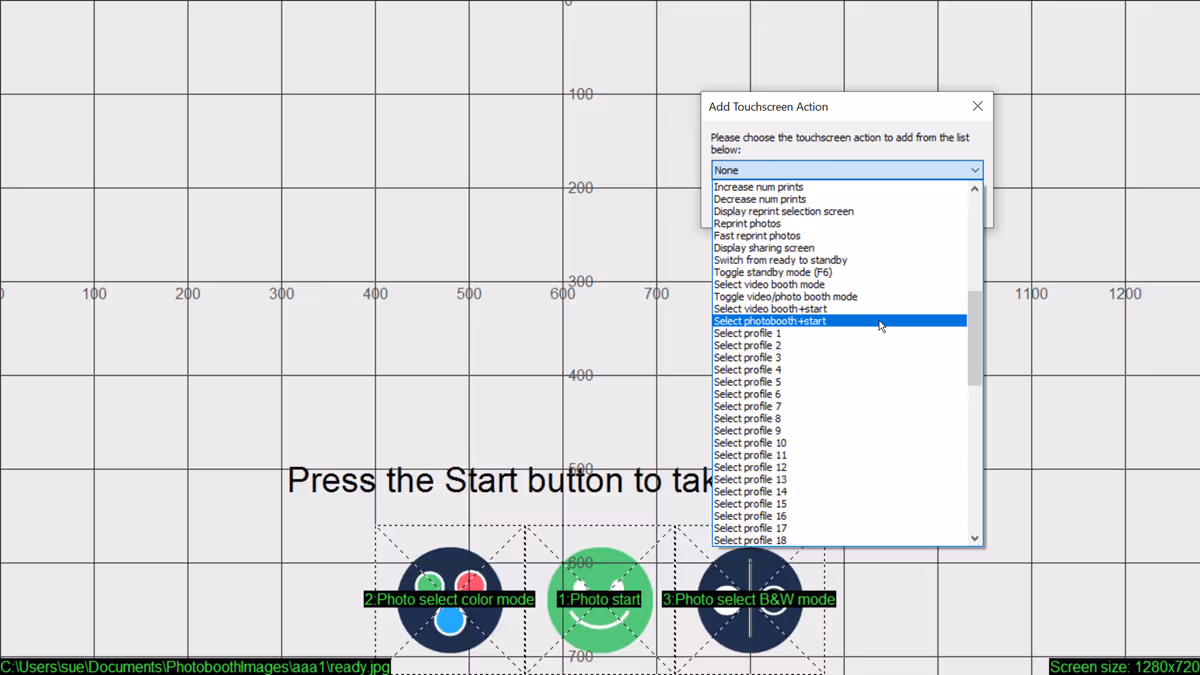
Selecting the Select photobooth+start action for a stills ready screen
You can either add the new action to an unused part of the screen or delete the old Photo Start action and replace it with Select photobooth+start

A new Select photobooth+start action has been added to the stills ready screen
If you prefer you can delete the Photo Start action and drag the new Select photobooth+start action to replace it.

Here the old Photobooth start action has been replaced by Select photobooth+start
When you are done right click and remember to save your changes as you leave.
Setting up the actions for burst GIFs and Video is very similar to handling still photos. GIF booths (and video booths) use the video_ready.jpg screen instead of ready.jpg
Edit the video_ready start screen and add the Select video booth+start action if needed.
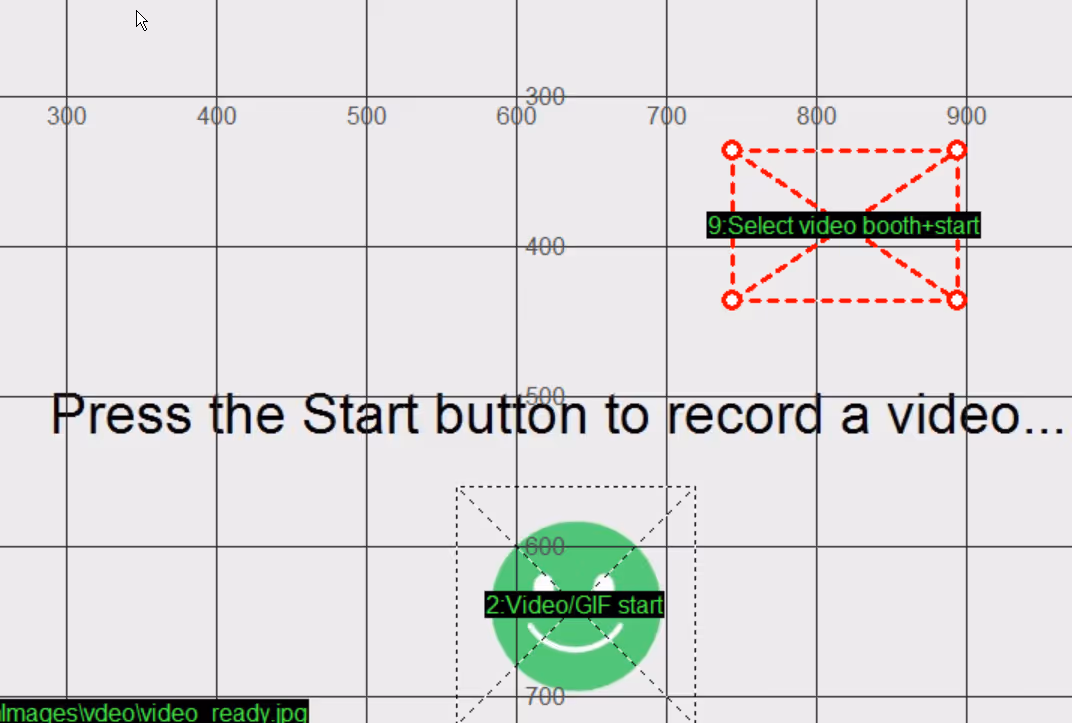
Adding a Select video booth+start action to the video_ready screen
The GIF playback screen is usally played after each GIF is captured. Guests choose whether to accept or reject the GIF before sharing it.
If you are capturing GIFs either remove the GIF playback option or keep it short (say 5 seconds)
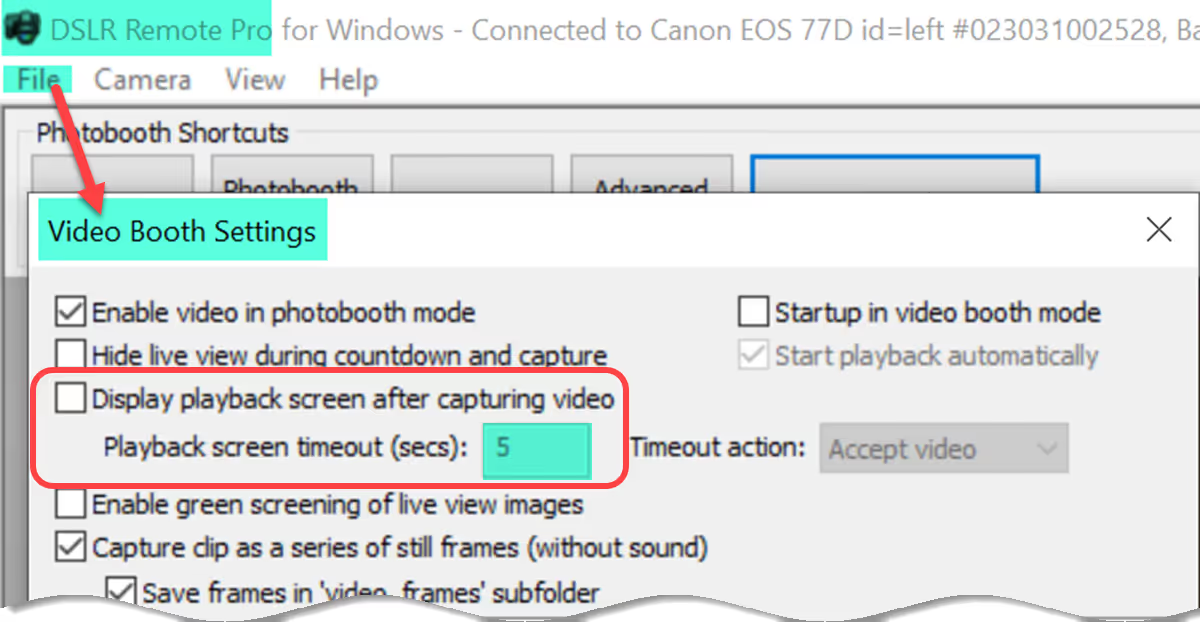
Removing or shortening the GIF playback screen (DSLR Remote Pro 3.15)
This section is only applies if you are using a Webcam to scan the QR codes
There are a few extra steps if you are using a web cam to scan the QR codes.
Desktop icon for the Breeze Webcam QR Code Scanner
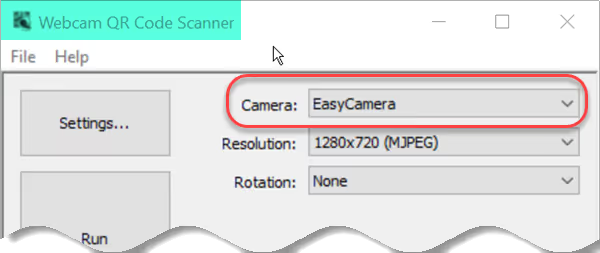
Choose EasyCamera if you are using the PC’s built in camera (Breeze Webcam QR Code Scanner)
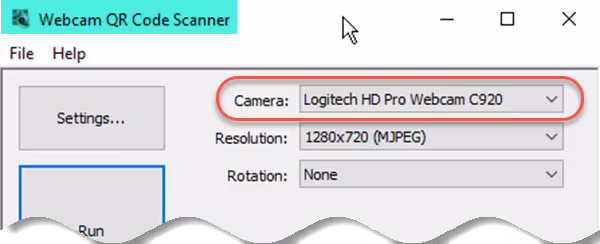
Select the external webcam if used – here a Logitech C920 (Breeze Webcam QR Code Scanner)
The Webcam QR code scanner program displays a live feed from the web cam. This helps guests place their phone and scan their QR code.
Use Settings… if you want to make the live view larger or smaller, and to move it to a better position on the screen.
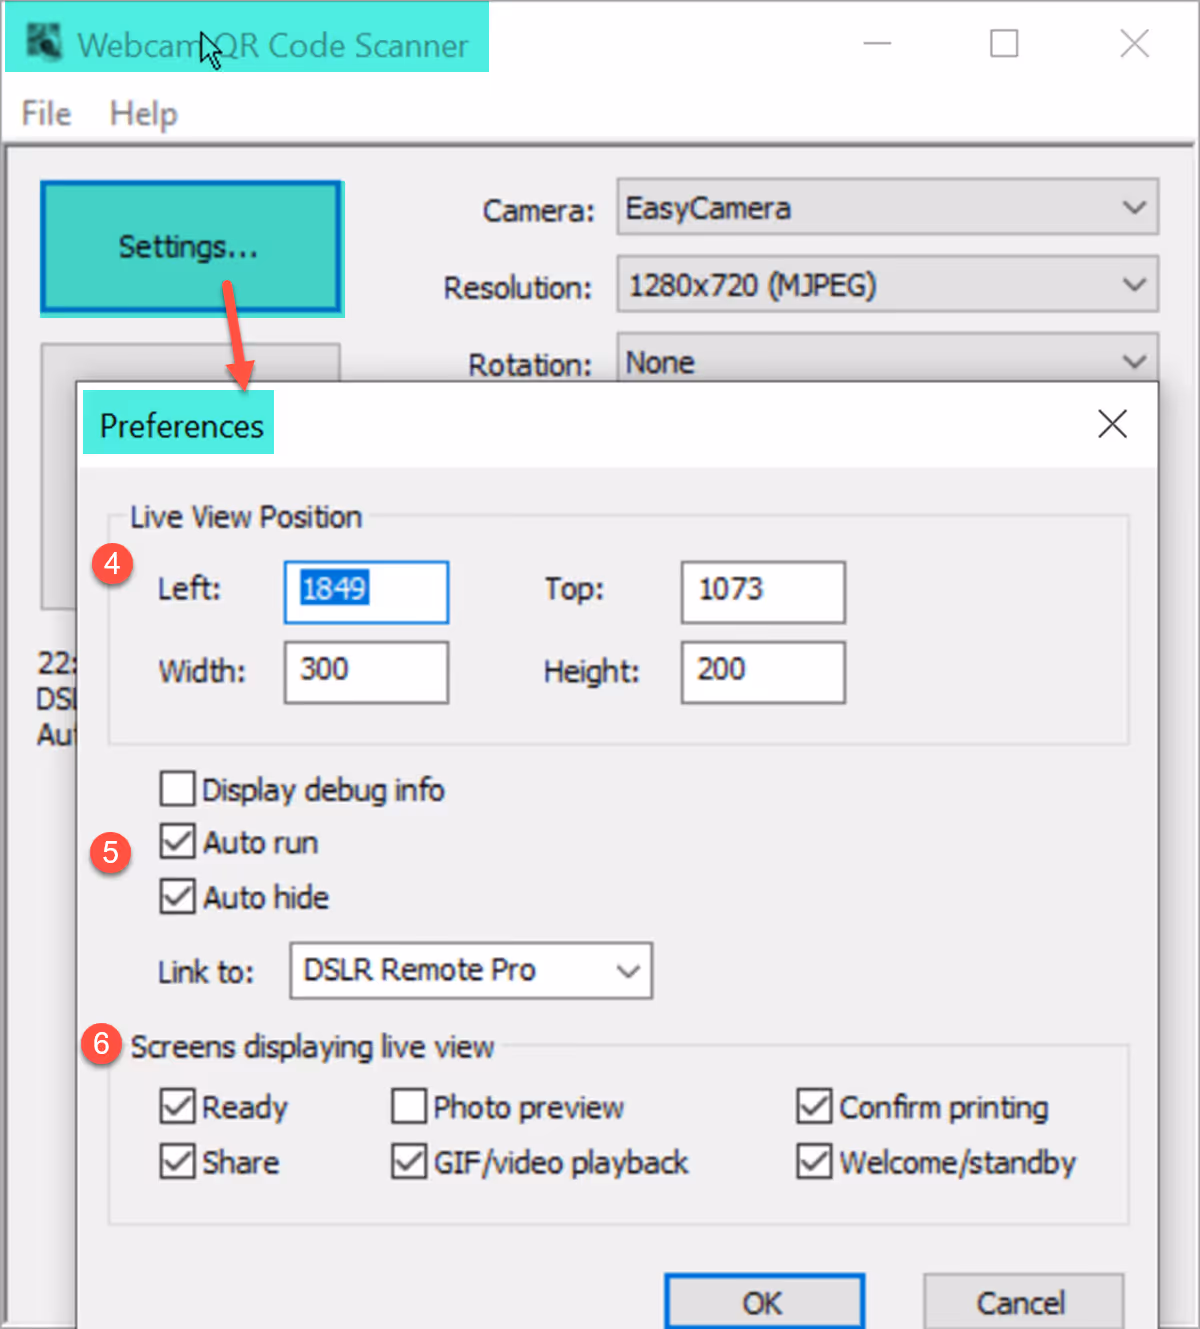
Webcam QR Code Scanner Settings screen(4) The top left corner, width and height of the web cam’s live view on the booth screen are shown in pixels
(5) Check Auto run and Auto hide, and Link to DSLR Remote Pro
(6) Check the boxes of all screens on which you need to scan a QR code ( this must include the Ready screen, also the Share screen for several guests to email images from the booth).
End of webcam users only section
The fastest way to start includes automated sharing by email. We will cover text based sharing later.
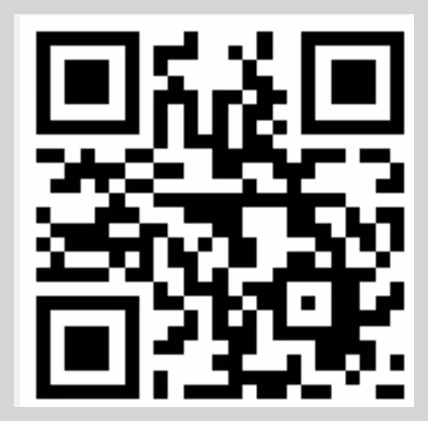
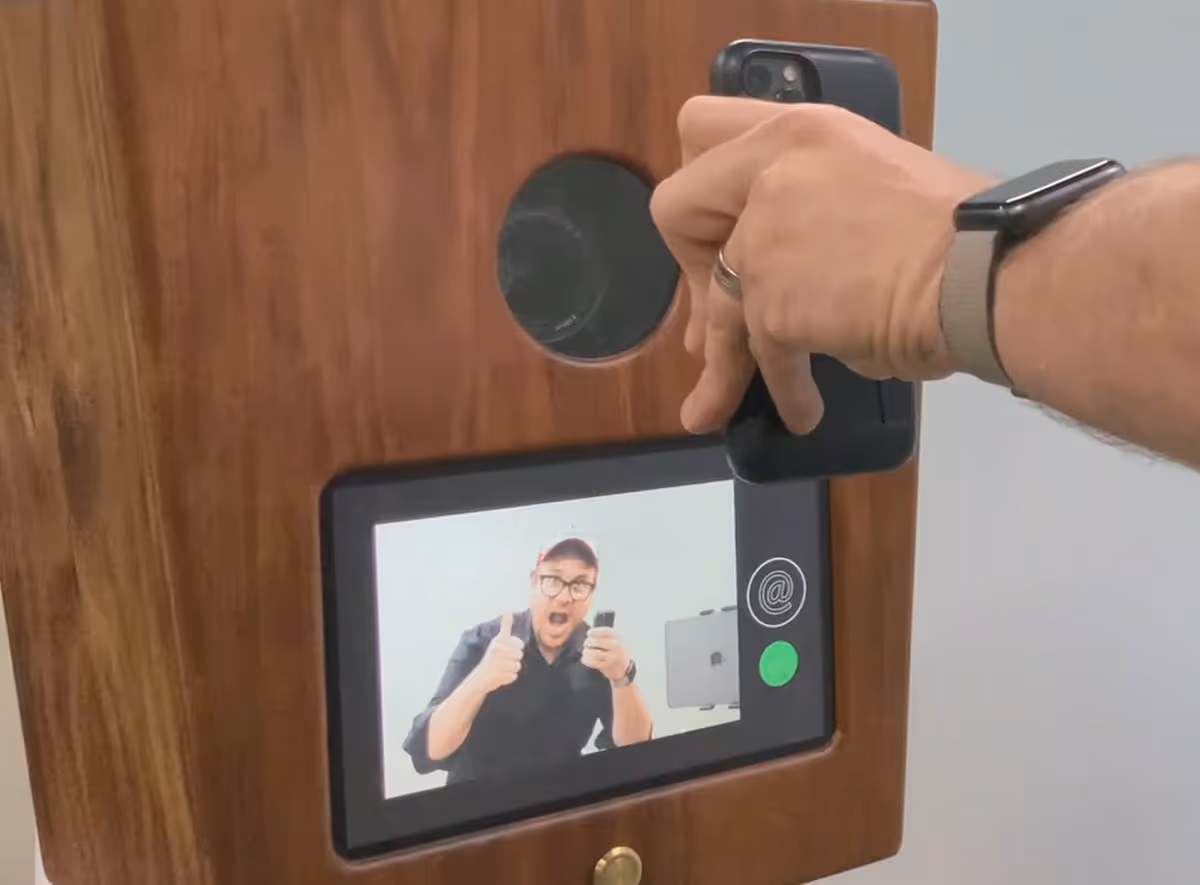
Scan this code to go to the QR code generator https://contactlessbooth.com


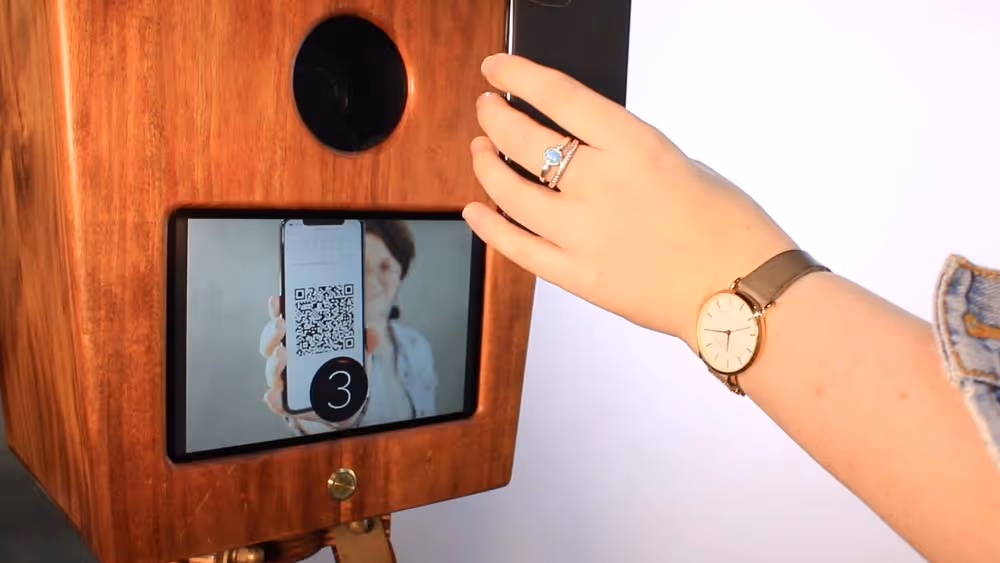
Showing a QR code to the booth camera to start the booth (Breeze DLSR Remote Pro 3.15)
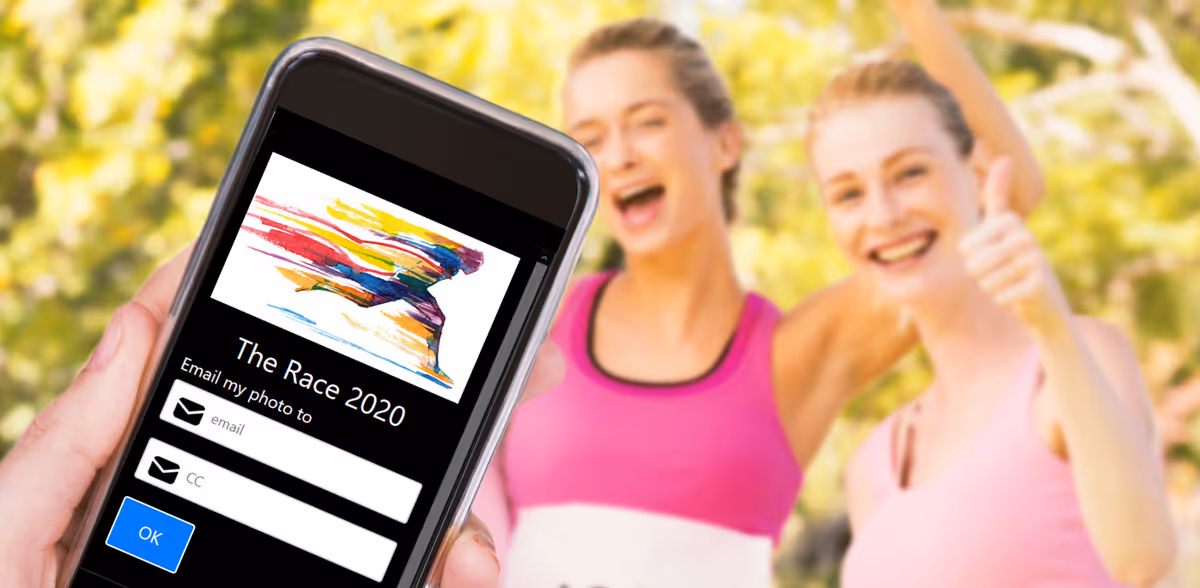
When the photos,GIFs/MP4 has been taken they will automatically be emailed to the guest who started the session.
Often several guests want to share the same images. That’s great.
The whole group can email images by scanning their own QR code into the sharing screen
Branded QR code generator offering sharing by both text ad email (Breeze contactless booth)
Many of you will want to personalize the QR code page. We have given it the generic domain name contactlessbooth.com to avoid giving away whose software you use. Go ahead, add your own branding and title to the Breeze QR page and make it your own.
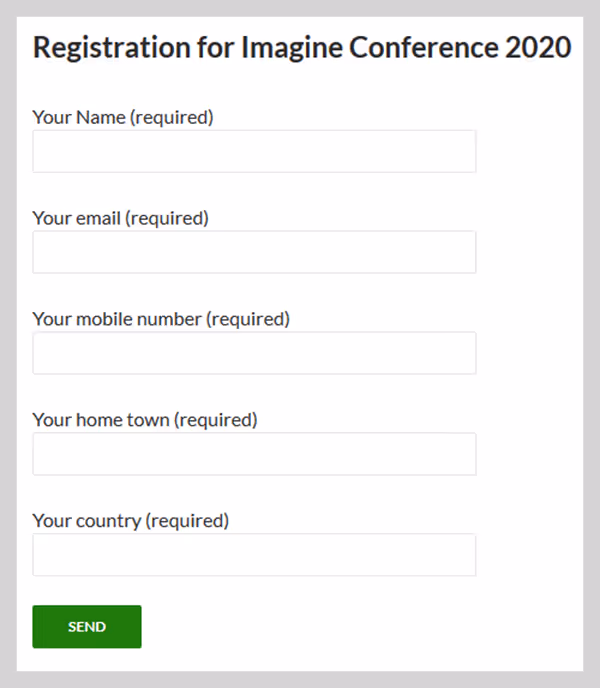
You can also host the QR Code generator on your own website, collecting survey data as well as contact details.
Soon after we released support for contactless booths, Breeze user Sou Xuan Hao Ewan instantly.sg shared a video demonstrating how to capture guest data and generate QR codes for contactless operation through your own WordPress website.
Ewan has kindly agreed we can share his very helpful guide with a wider audience:
August 2023: Please note the code generator mentioned in this video is currently not available
HTML users can use the HTML <iframe> tag to embed the QR code generator into a page on your own website
e.g. <iframe src=”https://contactlessbooth.com?title=iframe+Example” frameborder=”0″ width=”100%” height=”400″></iframe>
Adapt this sample php script for your website
You can add an overlay to your ready screens to prompt guests to show their QR code to the booth. This should be a png file placed in the PhotoboothImages folder
For stills screens call this overlay live_view_overlay.png
For burst GIF, slow motion and other video screens call this overlay video_live_view_overlay.png
You can also adjust many booth timings for a better guest experience. To return to the Ready screen more quickly at the end of each session, reduce the sharing screen timeout in Output Settings.
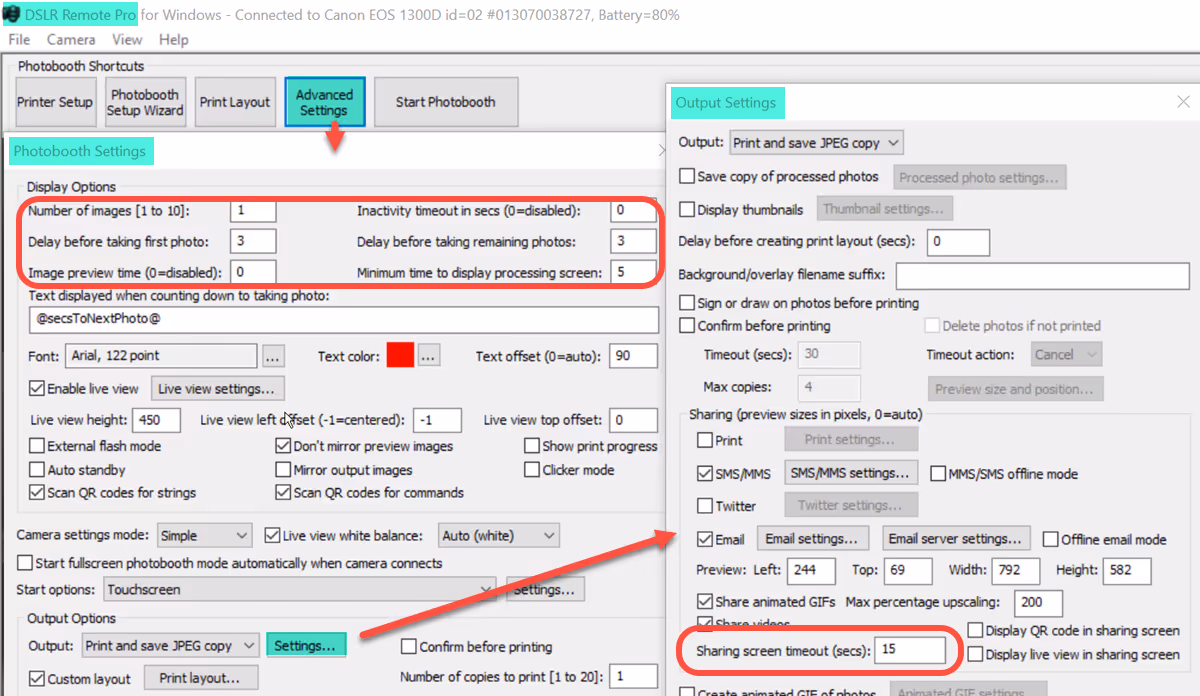
Adjusting the delay before each photo, inactivity and sharing screen timeouts (DSLR Remote Pro 3.15.1)
Learn how to host your own QR code generator and collect survey data here
The contactlessbooth.com QR code generator doesn’t collect guest data.
This tutorial has taken you through the basics of turning DSLR Remote Pro into a contactless booth which sends emails. Watch this video to get a feel for how much more you can achieve.
© Breeze Systems 2020
See why Breeze is considered the most powerful and flexible software in the industry.


.svg)