Once the basic page layout has been defined the clip duration, image size and position and output options need to be set. To do this click on the "Setup..." button in the main window and then click on the "Output" tab in the properties dialog:

For testing purposes the output settings should probably be set to save capture images and print layouts to disk without printing them. To do this we need to uncheck the "Print" checkbox and check the "Save live view frames" and "Save print layout" checkboxes.
The "Save live view frames" option will save a copy of the individual frames captured in the sequence. This is useful if you need to be able to reload the images after capture and wish to reprint later or to reprint using a different layout.
The "Save print layout" option saves the formatted pages to disk and is useful if you want to be able to reprint the flip book using the same layout. It is also useful during setup as it allows the printed layout to be checked without having to waste paper by printing it out each time.
The images are saved in the subfolders of the folder specified in the properties dialog. The subfolders are named using the date and time the clip was captured. For example a clip captured at 8:56:52pm on March 17, 2010 would be saved in the folder:
C:\Users\Chris\Documents\FlipbookImages\20100317-205652
The "Print pages in reverse order" option is useful when using a printer that outputs pages face up on stacks them on top of each other (e.g. most inkjet and dye sublimation printers). Setting this option will print the last page first so that the stack of pages ends up with the first page on the top. Most laser printers output the pages face down and don't need this option.
Some printers don't print the pages in the right order e.g. the Sony UP-DR200 when set to 6"x2" strips prints four pages in the following order: page 2, page 1, page 4, page 3. To compensate for this select the "Print even page first" option.
Select the "Printer cuts pages" if you are using a printer that prints 6"x4" pages and cuts them into two 6"x2" strips. This option tells the software to adjust the printing to ensure that pages come out in the right order after they have been cut by the printer.
Manual Page Layout
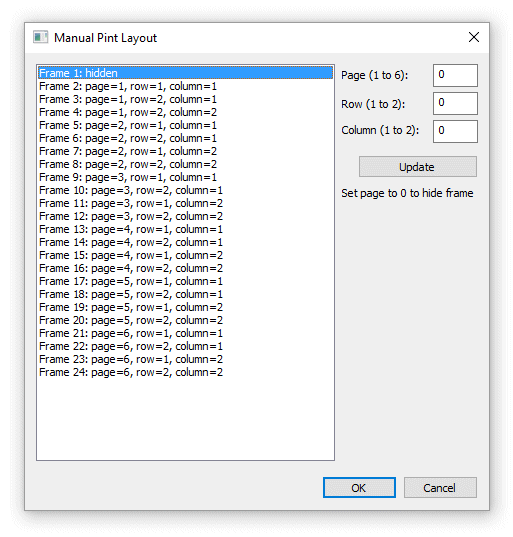
Select the "Manual Layout" option if the automatic layout options are not suitable for the type of printing being used e.g. using a color laser printer to print large sheets which are then cut using a business card cutter. Click on the "Layout..." to display the manual print layout dialog:

Select each frame in turn from the list and enter the page, row and column number where it should be printed and press the "Update" button to save the setting. A warning will be displayed if two frames have the same placement i.e. the page, row and column numbers are the same. Enter 0 for the page number if a frame should not be displayed (e.g. if the position where it would be displayed will be replaced by a title page).
Press the "OK" button to save the settings.
Printing a front cover on the first page of the flipbook
Select the "Print cover on first page" option if you want to print a cover page. When this option is selected the software does not print a photo on the first page of the flip book. There are two options for adding the graphics for the cover:
Option 1: printer page background image
The background image should be named background1.jpg so that it is only added to the first page printed by the printer.
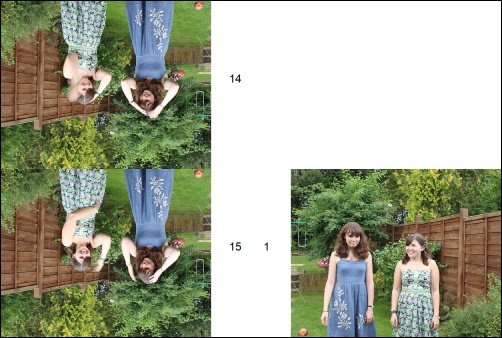
The simplest way to create the background1.jpg image is to select the "Save printed layout" option and unselect the "Print" option then print a test flip book. This will save JPEG copies of each page from the printer named page_01.jpg, page_02.jpg etc. Each page from the printer will consist of several pages for the flip book e.g. the output from a 6x4 dyesub printer will contain four flip book pages and will look something like this:

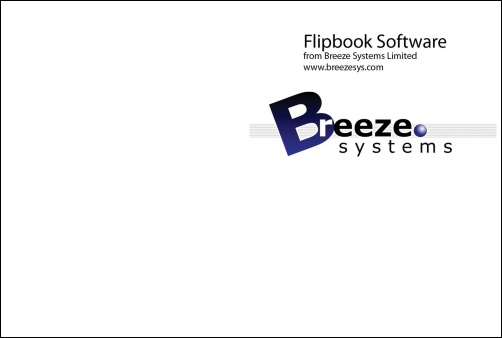
Copy page_01.jpg to your screen images folder and rename it background1.jpg. Then edit it in an image editor and replace the empty space with the graphics for the front cover and clear the rest of the image. The background1.jpg for a flip books printed using a 6x4 dyesub printer should look something like this:

The background1.jpg image should be saved in the screen images folder which is defined in the "Screen settings" tab of the settings dialog. Its location is also displayed in the main window under the heading "Screen images in:".
Option 2: Flip book page cover image
The cover page should be a JPEG image named flipbook_cover.jpg and should be placed in the screen images folder. If the cover image is larger than the flip book page it will be resized to fit and then displayed in the center of the page area. The size of the flip book pages in pixels can be displayed by clicking on "Display test page" of the "Output" settings.
A cover image suitable for the page layout shown above would look something like this:

Clip Duration and Frame Rate
The frame rate of the captured clip is determined by the number of images and the duration of the clip. Increasing the duration of the clip while keeping the number of images the same will decrease the frame rate. If the frame rate is too low the movement in the final flip book won't be smooth. If the frame rate is too high the camera may not be able to capture them fast enough and the clip will take longer than the specified time to capture. The maximum frame rate depends on the camera being used and the speed of the computer and is normally limited to around 10 frames/sec. A good starting point is a clip duration of around 6 seconds with a frame rate of about 5 frames/sec to give a flip book of about 30 pages.
Rotation and Cropping Settings
The "Camera rotation" setting specifies whether the live view images presented to the user should be rotated. If the camera is in normal landscape orientation this should be set to "none". If the camera is in portrait orientation this setting should be set to "90 CW" or "90 CCW" depending on which way the camera has been mounted. This setting can also be set using the Ctrl+Left and Ctrl+Right keyboard shortcuts when the live view is displayed on the computer's screen.
The percentage crop setting specifies how the captured images are cropped and affects both the display of live view images and the size of the printed images. A value of 0 represents no cropping and images will have the standard 3:2 aspect ratio. The percentage cropping has a range of -150 to 100.
Setting the percentage crop to a positive value will crop equal amounts from the left and right, making the image squarer. Setting the percentage crop to 100 will give a completely square image.
Setting the percentage crop to a negative value will crop equal amounts from the top and bottom of the image to produce a letterbox or panoramic effect.
This setting can also be adjusted using the + and - keyboard shortcuts when the live view is displayed on the computer's screen.
Setting the percentage crop to 0 will use the full field of view of the camera without any cropping. The aspect ratio of the live view images will depend on whether the video mode setting is selected. If the camera's normal photo mode is used the live view images will have an aspect ratio of 3:2. If video mode is selected the aspect ratio will depend on the video resolution set in the camera. The 1080p and 720p video resolutions have an aspect ratio of 16:9.
The "Image rotation" option controls whether the image is rotated before printing. The normal setting is "none" which will typically give a right handed flip book where the spine is held in the left hand and the pages are flipped using the right hand. A left handed book can be created by setting the image rotation to 180. Vertical format books where the spine is held at the bottom in one hand and the pages flicked with the other hand can be created by setting the image rotation to "90 CW" or "90 CCW".
The"Image position" option specifies where the image should be placed on the page and has the following options:
Right - the image is positioned on the right of the page with space on the left for binding the book
Center - the left hand column of pages have images on the right of the page and the right hand column of pages have the images on the left of the page
Bottom - the image is positioned on the bottom of the page with space on the top for binding the book
Outer - the left hand column of pages have images on the left of the page and the right hand column of pages have the images on the right of the page