Saving and Loading Settings
The current settings can be saved to file for future reference by selecting "Save Settings..." from the File menu and reloaded by pressing "Load Settings...". This is makes it possible to define a number of different layouts, screen designs or green screen backgrounds which can be selected before entering fullscreen mode or when the ready screen is displayed.
You can use the tokens {photoboothDir} and {photoboothSubdir} to specify a different directory for each profile:
{photoboothDir} gives the full path of the screen images folder e.g. C:\Users\Chris\Documents\FlipBookImages
{photoboothSubdir} gives the name of the screen images subfolder e.g. if the screen images folder is C:\Users\Chris\Documents\FlipBookImages then {photoboothSubdir} would become FlipBookImages
Profiles
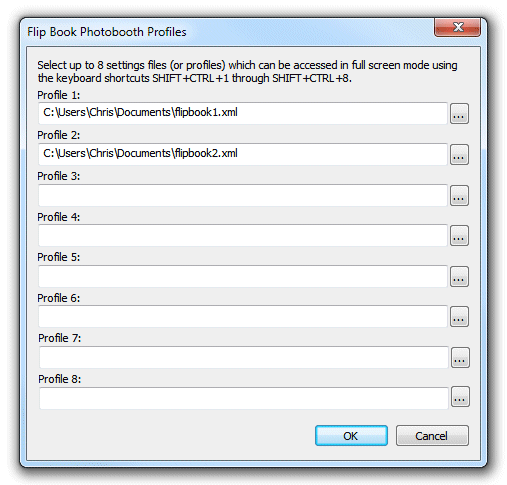
Profiles allow you to use a keyboard shortcut to switch between different sets of saved settings. To assign a profile to a keyboard shortcut select "Profiles..." from the File menu to display the following dialog:

Then click on "..." button for the appropriate profile and select a previously saved set of Flip Book Photobooth settings. In the screenshot above profile 1 (keyboard shortcut SHIFT+CTRL+1) loads the settings file flipbook1.xml and profile 2 (keyboard shortcut SHIFT+CTRL+2) loads the settings file flipbook2.xml. Profiles can be used to allow users to selects different sets of settings e.g. profile 1 might define a small book of 28 pages and profile 2 might define a larger book with 40 images. Alternatively different profiles could be used to select different screen image folders to allow users to choose different green screen backgrounds.
The tokens {photoboothDir} and {photoboothSubDir} can be used to specify the pathname of the profile file to be loaded. The tokens are replaced with the value of current photo booth images folder and provide a way to use more than 8 profiles.
The following keyboard shortcuts can be used to select profiles when the ready screen is displayed:
Shift+Ctrl+1 - select profile 1
Shift+Ctrl+2 - select profile 2
Shift+Ctrl+3 - select profile 3
Shift+Ctrl+4 - select profile 4
Shift+Ctrl+5 - select profile 5
Shift+Ctrl+6 - select profile 6
Shift+Ctrl+7 - select profile 7
Shift+Ctrl+8 - select profile 8
Shift+Ctrl+N - select next profile
Shift+Ctrl+P - select previous profile