Double click on an event in the the main Event Editor window to edit the event. Alternatively right click on the event and select "Edit event..." or select the event and click the "Edit event..." button.
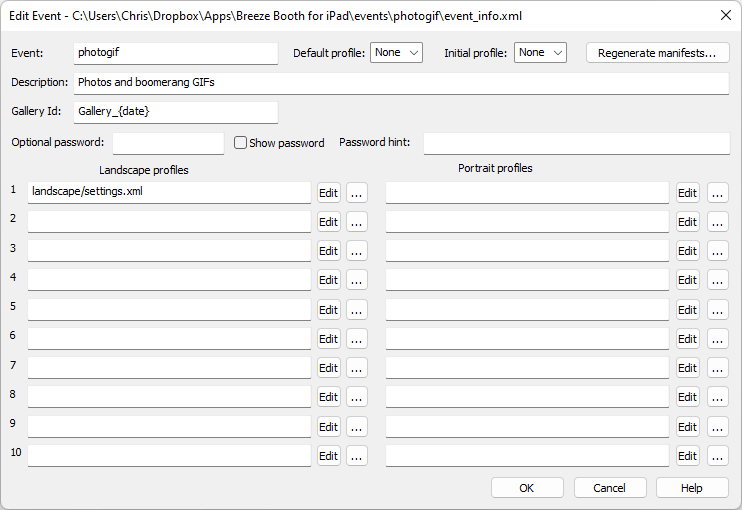
This will open the "Edit Event" dialog:

The current event name and optional description are displayed in the "Event:" and "Description:" fields and can be changed if required.
The gallery id is used to help identify which gallery photos should be added to when using online gallery systems such as Event Kite. The gallery id token, {eventKiteGalleryId}, can added to email messages or used to define QR codes. You can also use the Event Kite session id token, {eventKiteSessionId}, to identify a set of photos.
Events are made up of profiles which consist of the settings to use plus the screen images and other assets. Simple events only need one profile. More complex events can use profiles to offer users choices such as choosing different print layouts.
Click the "Edit" button to the right of the profile path to edit the settings for that profile. This will display the "Photo Booth Settings" dialog:

The "Photo Booth Settings" dialog has seven tabs for defining the event settings:
| 1. | General - general settings that specify how the event starts up and behaves, the use of virtual props and the touchscreen actions used to control it |
| 2. | Photos - settings controlling photo mode e.g. the number of prints and the print layout |
| 3. | Slideshow GIFs - settings for optional slideshow GIFs and/or MP4 files created in photo mode |
| 4. | Burst GIFs - settings for burst and boomerang GIFs |
| 5. | Videos - settings for capturing videos |
| 6. | Share - settings for sharing photos, GIFs and movies via email or text |
| 7. | Gallery/Slideshow - settings for the sharing gallery and slideshow |
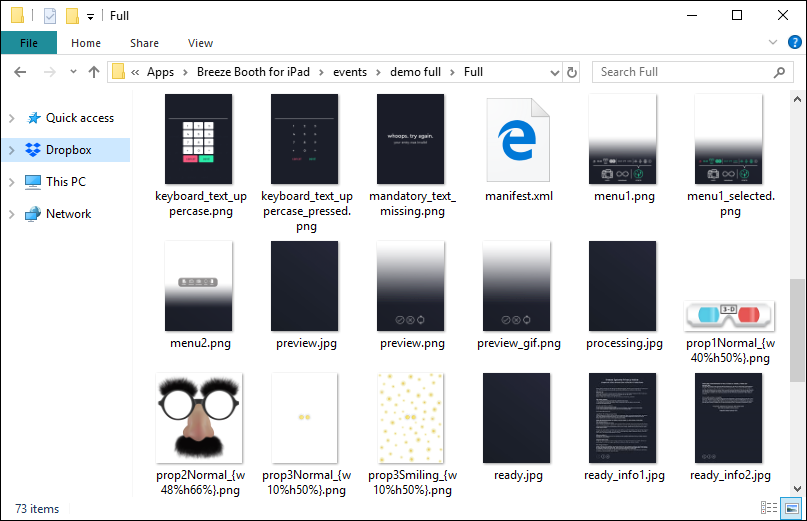
Screen Folder
The visual assets (e.g. screen images, virtual props, overlays, backgrounds etc.) for an event are stored screen folders:

The location of the screen folder is specified in the "General Settings" screen.
An event comprises of one or more profiles which define the settings and the folder where the various screen images and other assets are stored. Profiles are useful for events where you want to give guests a choice of options. A typical setup consists of a default profile which shows a menu of options linking to a profile for each option e.g.
| • | Supporting multiple languages by having a main menu screen to select the language and a separate profile for each language |
| • | Offering a choice of normal photos or AI background removal |
| • | Offering a choice of square photos or traditional rectangular photos |
| • | Offering a choice of different print layouts e.g. one single photo or a passport booth style strip of three photos |
Separate profiles can be defined for landscape and portrait orientations of the iPad. This is useful if the iPad is mounted so that it can be rotated between portrait and landscape orientations because it allows different settings and screen layouts to be defined for each orientation.
Each profile is stored in a separate subfolder of the current event's folder and contains a settings.xml file, one or more screen files and an associated manifest file. The manifest file is simply a list of files and their checksums in that folder and is used when updating events on an iPad. If you edit a profile's settings and save them the associated manifest file is updated automatically. Sometimes it is necessary to update the manifest files manually (e.g. when editing a screen image using Photoshop or adding files) and this can be done by right clicking on the event and selecting "Regenerate manifests...". If you make some changes to an event but the updated files aren't copied to the iPad try regenerating the manifests and updating the iPad again.
Please see Updating Events for more information.
When multiple profiles are defined you can specify a default profile that is loaded after taking each set of photos. This is useful if you have a main menu defined using one profile and want to return to the menu screen after each session.
You can also define an initial profile to use at startup. When the event is run it will load the initial profile, but after each set of photos it will load the default profile. The initial profile is useful if you want to display information to the user when starting an event e.g. giving help information about setting everything up and the option to sync the event in case it has been updated.
If the initial profile is set to "none" the default profile will be loaded when the event is run. If the default profile is also set to "none" the first profile in the list of profiles will be loaded.
Touchscreen actions can be used to load a profile when running the photo booth e.g. the action "profile1" will load profile 1. A touchscreen action can also be used to load a profile and start the countdown e.g. "profile1AndStart". A randomly selected profile can be loaded using one of the random profile touchscreen actions e.g. "profileRandom1To5" to load a randomly selected profile in the range 1 to 5 or "profileRandom6To10" to load a randomly selected profile in the range 6 to 10.
Copying a profile from another event
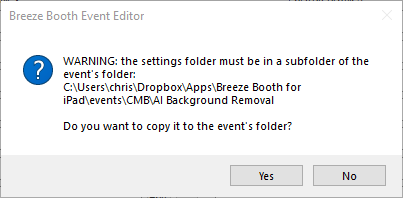
To copy a profile from another event click on "..." button to the right of the profile it is to be assigned to in the Edit Event dialog. This will open a file dialog. Navigate to the folder containing the profile to be copied and select the settings.xml file. A warning message like the one below will be displayed asking whether to copy the profile folder to the current event folder:

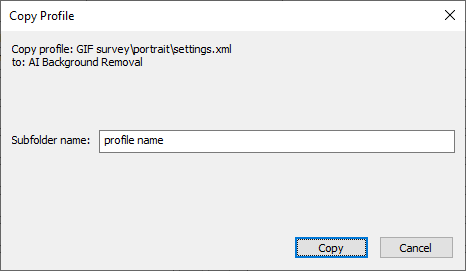
Click "Yes" to display the "Copy profile" dialog:

Enter the name of the subfolder where the copied profile should be stored and then press the "Copy" button to copy the profile.