Since version 3.20.1 AI Background Removal can now be done via the Image Post Processing feature and BreezeFX.
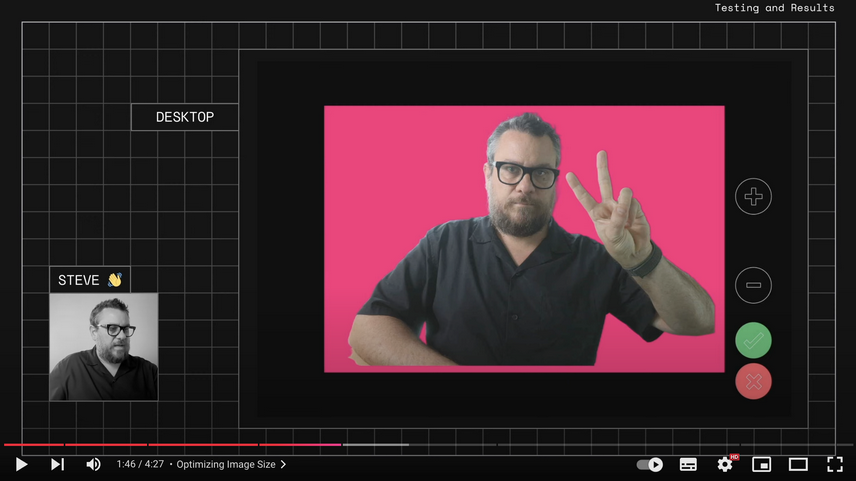
Watch the tutorial at https://www.youtube.com/watch?v=DAuu9fs0f5Q&t=107s
The AI background removal option uses subscription based online services which use AI (artificial intelligence) to automatically remove the background from a photo (aka "green screen without the green screen". This can be done using services from:remove.bg or AI Background Remove
The example photo shown below was taken during Photo Booth Expo 2020 and shows how effective AI background removal is at removing a distracting background:
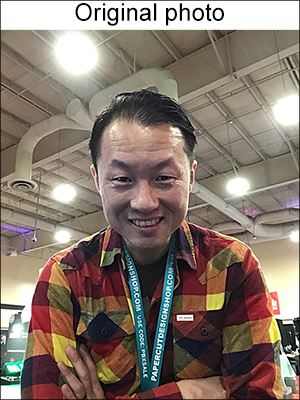
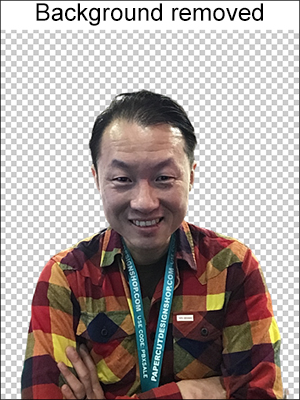

Note: This example was actually captured using Breeze Booth for iPad but similar results can be obtained using DSLR Remote Pro
Please note: AI background removal services are provided by other companies who charge for their services. These companies have no connection with Breeze Systems and Breeze Systems is not responsible for the content of their websites. In order to these services you need set up an account with them and copy your credentials to the Remove Background utility.
remove.bg, AI Background Remove and gadbooth.com are all web based service and so you will need a reliable internet connection in order to use them at an event.
After applying AI background removal the photos added to the print layout will have a transparent background and the background will be the background defined in the print layout (e.g. a background.jpg image). You can allow users to choose different backgrounds in the print confirmation screen after the photo has been taken. Please see Swapping print backgrounds for details.
In Operation
AI background removal works by using the image editor option to to run the Remove Background utility which connects to the background removal service to create a PNG copy of the photo with transparent areas where the background has been removed. This PNG image is then used in the print layout and slideshow GIFs. The background images defined for the print layout or slideshow GIF will be visible in the transparent areas of the PNG image.
The easiest way to set this up is to run DSLR Remote Pro and select "Run AI Background Removal tool..." from the File menu:
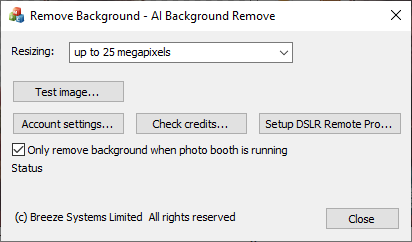
Click on "Account settings..." to select the AI background removal service you wish to use and to enter your credentials for the service. The click on the "Setup DSLR Remote Pro..." button automatically setup DSLR Remote Pro with the necessary settings. You can also disable background removal by clicking on the "Set DSLR Remote Pro..." button.
The automatic setup makes the following changes:
| 1. | The File->Setup image editor... is setup to run RemoveBackground.exe automatically when a photo is taken and is downloaded to the PC |
| 2. | Greenscreen removal is enabled with the transparent background option selected |
| 3. | The "Delay before creating print layout" in the "Output Settings" dialog is set to 60 seconds to allow time for the background to be removed before creating the print layout or slideshow GIF |
Click on the "Account settings..." button in the Remove Background utility to select the background removal service you wish to use and to enter you credentials:
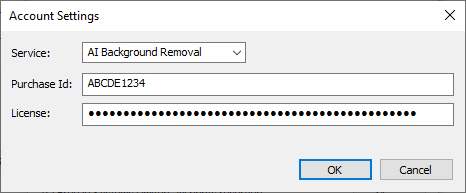
Select the AI background removal service you wish to use from the "Service" dropdown list. Then enter you credentials in the text areas below. For the remove.bg and Gadbooth services the credentials will be in the form of an API key which can be obtained by logging into the services using a web browser. For the AI Background Removal service the credentials will be in the form of a purchase id and license code which are sent to you when you subscribe to the service.
Click on the "OK" button and then click on "Check credits..." to check the settings and to check the number of credits you have remaining. The account information will be displayed in the status lines under the "Only remove background when photo booth is running" checkbox:
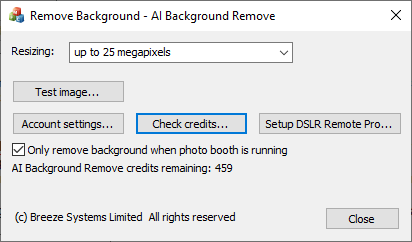
Use the resizing checkbox to specify the size of image to be converted. It is best to set this to the lowest setting needed for your prints or slideshow GIFs to reduce the amount of data that needs to be transferred to the servers.
The special "Up to 0.25 megapixels" setting can be used to reduce the cost per image when using remove.bg. At the time of writing remove.bg provide 50 free preview images (up to 0.25 megapixels in size) each month and then only charge 1/4 of a credit once the preview credits have been used. The services from AI Background Remove and Gadbooth use one credit for all image sizes.
You can check the service is running by clicking on the "Test image..." button and selecting a suitable JPEG image to test.
Please note that testing an image may use up one of the credits purchased in your subscription.
At the time of writing remove.bg provides 50 free preview credits per month and options for buying "Pay as you go" or subscription based credits. You can use the 50 free preview credits for testing without having to enter any payment details.
Please see this post from our blog for information on how to create slideshow GIFs with animated backgrounds.
Only performing AI background removal for some profile and not for others
You can use profiles to provide guests with a menu of options and set this up in such a way that some profiles will use AI background removal and some won't. This can be setup by naming the photo booth image folder used by each profile to indicate whether AI background removal should be used e.g. by including the string 'aibg' in the folder name.
The RemoveBackground.exe utility used to perform the AI background removal is called using the image editor option. The image editor command can use tokens to only run the command if the photo booth images folder used by the profile contains a certain string (e.g. aibg).
Please see the section on Editing images and editor setup for more information.